Friday, April 12, 2013

DESIGNER CRAFTS CONNECTION - COUSIN SLIDE BRACELETS!

One of most exciting facets of being a creative designer is when companies send you complimentary products to create with!  The Cousin Corporation (which is just up I-75 from me in Largo, Florida) is a family owned jewerly crafting and bead company that started out in 1970.  Truly a success story.
 
Cousin has a new Slide Bracelet line that is available at Joann's.  They are quick and easy to create and come in a variety of fashionable colors and themes.  Check out the video and pick up some components today!
 
 
I received a blue and a red leather bracelet with burnished gold clasps and slides along with a cute owl and heart accent slides. 
 

For the first slide bracelet, I "painted" the blue leather with Ranger Perfect Pearls, then embellished the owl slide with Turquoise Stickles by Ranger and more Perfect Pearls.  Measure your wrist and cut the leather down to size with wire cutters.  Use just a small dab of E6000 glue to secure your owl and accent slides in position, then secure the clasps.  I also added square turquoise rhinestones that I had in my stash.

For the second slide bracelet, I stamped on the red bracelet with a script handwriting stamp, to look like love letters with Ranger Archival Ink.  Then I inked in the center of the leather with the black ink to set off the heart slide.  Measure your wrist and cut the leather down to size with wire cutters. Use just a small dab of E6000 glue to secure the heart and accent slides in position, then secure the clasps. I also added small black half pearls that I had in my stash.
 
 
I hope you have enjoyed my Cousin Slide Bracelet projects today.  As a part of the Designer Crafts Connection Blog Hop, please use the navigation box on my right sidebar and hop back or hop forward to see all of the gorgeous and creative ways that the rest of the designers have featured their Cousin Slide Bracelets.
 
Thanks for stopping by!  -Beth

Monday, April 1, 2013

DESIGNER CRAFTS CONNECTION - FIRST MONDAY IN APRIL!


Welcome to the DCC Blog Hop for April!  Our theme this month is one that I live by - RECYCLE - not only in my everday life, but also in my craft life.  I love saving containers, cast-offs and unusual materials then turning them in to something completely unexpected!

That is just what I did this month with my FAUX DENIM WREATH with BUTTON FLOWERS, so let's get on to the project!

MATERIALS & SUPPLIES:
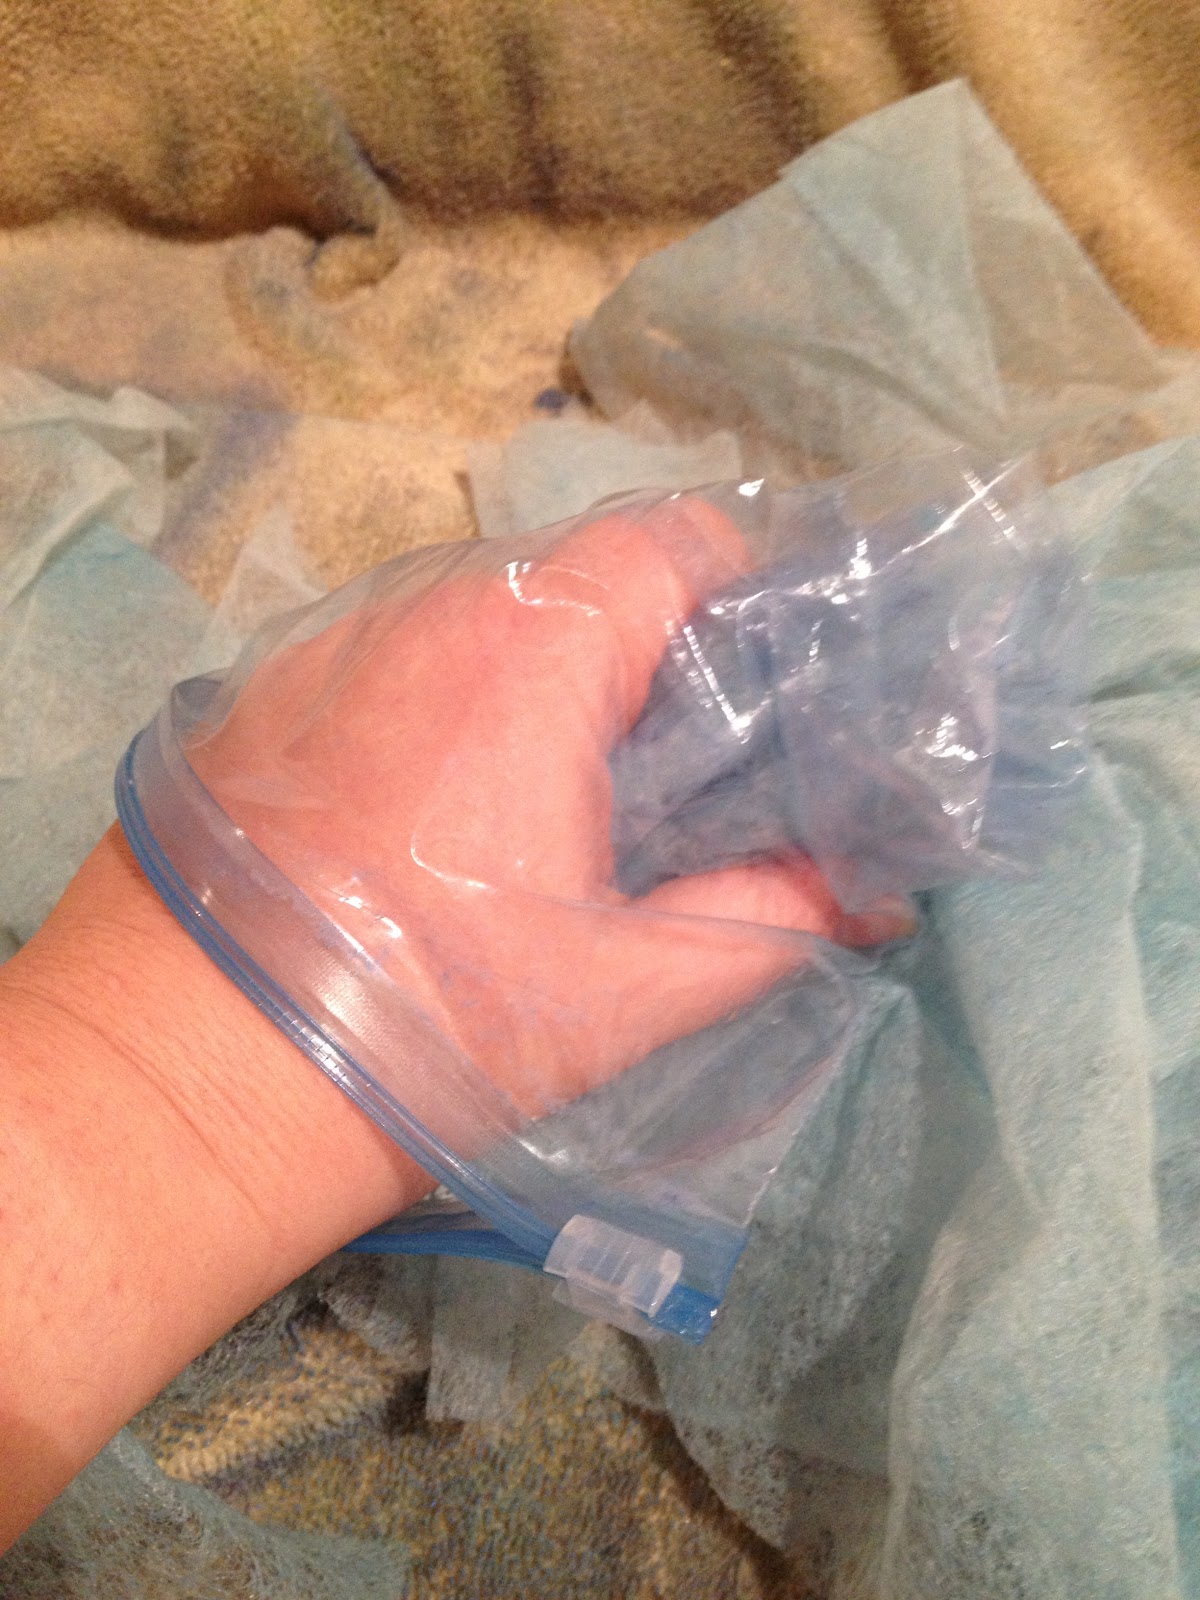
1.)  Lay out half of the dryer sheets on an old towel and randomly spray with Cornflower and Blue Smoke spray mists.  Place the plastic storage bag on your hand and randomly "scrunch" the dryer sheets to distribute the spray mist evenly.  Repeat with second half of dryer sheets using the Turquoise and Forever Blue spray mists.  Place in dryer with towel for 5 minutes to dry.
 
2.)  Measure in 1 1/2" from edge of Smoothfoam Disc in one inch intervals around the disc and connect the measured marks to create a circle.  Cut the center from the Smoothfoam Disc to create a wreath shape and sand lightly.  Paint the front and sides of the Smoothfoam with Americana Paint in Baby Blue, let dry.


3.)  Cut each dryer sheet in smaller pieces by folding and cutting in half three times to create rectangles approximately 2" by 1".  Place one piece of dryer sheet on the Smoothfoam at 12 o'clock, then poke and twist into the foam with the tip of a sharpened pencil.  This will create a "tuft" of fabric AND secure the fabric in the foam.  Continue to poke and twist all of the pieces of dryer sheets randomly in to the top and sides of the Smoothfoam until all of the foam is covered.


4.)  Double stack colorful buttons then "thread" wire through the button holes and twist to secure.  Randomly place all button "flowers" on wreath by poking wires in to the Smoothfoam.


Hang up your wreath and ENJOY!

RECYCLING TIPS:
Tip #1 - Reuse mail order catalogs as paint palettes, simply open to the centerfold, use then rip off and discard in the receyle bin!
Tip #2 - Reuse plastic bags instead of expensive latex gloves when painting, misting, etc.  It saves your hands from getting stained!
Tip #3 - Reuse cereal and other food boxes when you need chipboard shapes and or letters.  Either trace and cut the shapes you want or Die Cut.  Cover the printed side with paper or paint!
Tip #4 - Reuse soup and other food cans a water basins to wash out your paint brushes - OR - cover these cans with paper or fabric to hold your paint brushes in your studio!
Tip #5 - Reuse the plastic containers that Crystal Light drink mix is packaged in.  They are great to store small items like flowers, brads, beads, etc. OR fill them with goodies.  I make Sweet and Spicy Nuts for my family and friends at Christmas time and these containers are the perfect size!

Well, I hope that you have enjoyed my post for today!  Now you can HOP around to all of the DCC Designers to see the FLOWER themed projects they have created with items that they have RECYCLED from around the house!  Just use the navaigation box on the right hand side of my blog to hop forward or hop back!

Thanks for stopping by!  -Beth

Saturday, March 9, 2013

DESIGNER CRAFTS CONNECTION - BUTTONS GALORE & MORE BLOG HOP

Today a group of Designers from the Designer Crafts Connection are hosting a Blog Hop with Buttons Galore & More!  BGM has generously donated buttons for us to create with. 
 
The give away from Buttons Galore & More and Viewtanier starts today and ends on March 17th. Leave a comment to enter. There will be a prize for one participating Designer and one Reader who comments. Drawings are random, so leave comments on all the blogs for more chances to win!
 
We were given a theme of Wedding, so I decided to make a keepsake tin.


Start out with a new or recycled tin in any shape or size, mine was round.  It was already silver, so I decided to put a more modern twist on the gold buttons I received.


Begin by cutting the shank from the back of your buttons with wire cutters.  Then dry fit the buttons on the top of your tin until you are pleased with the composition.  I always take a picture on my cell phone when I have items that are dry fit, so that if I bump or shift the piece I always know what my original design looked like.  Glue each button into place with Aleene's Original Tacky Glue from I Love To Create, then let dry.  This is my go to glue for my craft projects.

 
The next step is to lightly spray paint your button embellished lid with Krylon's Indoor/Outdoor Primer in White this blocks the base color of your project and primes it to take other types of paints and finishes.  It works on metal, glass, wood, plastic and alot of other surfaces.  I use this primer all of the time. 


Next paint your lid and base to match the color scheme of your Wedding.  I chose to keep it modern and country chic by using Design Master Super Silver to color my container. 


Add two lengths of crocheted lace trim, one around the edge of the lid and another around the bottom edge of the tin.  Secure lace with Tacky Glue, let dry.

 
Make a tin for each Bridesmaid in your Wedding party and fill with a lovely pearl necklace or earring set that you would like them to wear on the day of your Wedding.  Make a tin for yourself and keep memories of your Wedding Day inside.  I think it would be nice to inscribe the bottom of the tin with the Bride & Groom's names along with the date to truly create a keepsake.


Use the DCC hop button on my right side bar to see hop around many more fabulous button projects!

If you have the time, stop by and see the Buttons Galore & More NEW RELEASES visit the BG&M Blog at and follow them on FaceBook for projects and give aways!

Viewtainer has donated the containers for the contest winners, VIEWTAINER containers have clear walls, come in fun bright colors with an easy dispensing cap and NO spilling! Proudly made in the USA!  To see the complete line of Viewtainer products visit their website at www.viewtainer.com blog http://viewtainer.typepad.com/blog/ and like them on FB at www.facebook.com/Viewtainer!
 
Thanks for stopping by!  -Beth

Monday, March 4, 2013

DESIGNER CRAFTS CONNECTION - FIRST MONDAY IN MARCH

THE DCC THEME FOR MARCH IS - FAVORITE TECHNIQUES!

I pondered over this post for a while, because I have discovered and been taught so many wonderful techniques over the years, but I kept coming back to my favorite technique of all time - CRACKLE!  Crackle is so very versatile, textural and just down right amazing that I had to share it with you today!
 
 
I have been layering and crackling paint on various surfaces since I first started crafting as a child.  Back then my tools and supplies were limited and the first time I achieved the crackled paint effect it was purely an accident, but I have been in love with the effect ever since! 
 
When I was 9 or 10 I received a hand-me-down kitchen table and chair set from a family friend for my dollhouse that was already painted red.  Some of the pieces were loose, so I glued those first and wasn't very neat with my technique, so a smeared the extra glue over the surface of the chair seat to dry because I knew I was going to repaint them.  When I painted the blue over the areas that had the dried glue this wonderful feathery crackle finished appeared and I was hooked! 
 
Using traditional white glue (like Elmer's) is less expensive than using a medium, but you have a very small window of opportunity with the White glue and the result is not as consistent.
 
Over the years I have tried many products for crackling, but I keep coming back to one for it's ease of use - Americana Paints Weathered Wood Medium by DecoArt.  This particular medium stays workable for quite a long time - I have event left it overnight, then applied a top coat in the morning and the crackle effect was wonderful.

OK, enough talking, let me show you the wonderful examples of this technique.


Above is a simple piece of white foam board that I painted with Americana Paints Burnt Umber.  I let the base coat dry completely then applied the Weathered Wood Medium in a thin coat (top - this will give you smaller cracks) and a very heavy coat (bottom - this will give you larger cracks). 
 
Let the medium set up for at least 30 minutes, but like I said earlier, I have let it sit overnight before.  The crackle effects works the best when you apply a contrasting top coat and I like the dark base coat with a light top coat effect the best for a Shabby Chic finish.  To apply the top coat you must move quickly and only paint over the surface once - do not go back over your paint strokes or the crackle will not appear. 
 
 
In this first example (above) I have painted a thin top coat of Americana Buttermilk over my thin Weathered Wood coat with my strokes all going in the same direction to reveal fine, thin almost feathery cracks.


In the second example (above) I have painted the Americana Buttermilk in very thick and random strokes over the thick Weathered Wood coat to reveal thicker and chunkier cracks.
 
I played around with some colors and application thicknesses of the paints and Weathered Wood medium, just to give you an idea of how versatile this technique truly is. 
 
 
Lighter base coats with darker top coats.


Different color combinations and thicknesses of the Weathered Wood medium.
 

Then I tried some metallics, which I had not worked with the crackle.  The sample to the left is Dazzing Metallics Glorious Gold base coat and Burnt Umber top coat, which looks very nice, especially up close.  The sample to the right is Burnt Umber base coat with Patio Paint Pot O' Gold top coat.  Not sure what the Patio Paint has added to it for durability in exterior applications, but it did not crackle well at all.
 
The surfaces that you can apply a crackle technique to are endless.  In my sample projects above I have crackled on Smoothfoam Balls, a Canvas, Wooden Candlesticks and scrapbook Paper, but the applications are endless.  Try crackle on air dry clay, paper mache, plaster, scrapbook paper, cardboard and even ceramic bisque!
 
I hope you have enjoyed my favorite technique today.  Please use the Designer Crafts Connection icon on my right hand task bar to hop around to all of the other DCC Crafters to see what their favorite techniques are!  I can't wait to check them all out!

We also have a contest for March from FABSCRAPS!  Don't forget to "like" their FB page

To enter to win, hop through the blogs and then leave a comment on whichever blogs have the technique you think will be your new favorite (pick me, pick me!) and then visit Julie McGuffee's Life in the Craft Lane blog to leave a comment there saying which technique(s) you liked...you have so many chances to win! Julie will pick a winner from all the comments in the hop at the end of March. Good luck!
 
Thanks for stopping by! - Beth


Sunday, February 3, 2013

DESIGNER CRAFTS CONNECTION - FIRST MONDAY IN FEBRUARY

Our theme for February is - of course - Handmade with Love!

Today I want to share a 3D mixed media heart that I made to hang on my front door instead of a traditional wreath.

I started out with a paper mâché heart form purchased at Michael's. Then covered randomly with crumpled patterned scrapbook paper and vintage music sheet pieces. Dry brush with coordinating Americana Paints from DecoArt - I used Petal Pink, Country Red and Barn Red. Create texture by dipping a cardboard tube, end of paint brush and bubble wrap in various paints and layer over the papers.

Die cut flowers from colored tissue paper and vintage book pages using the Big Shot from Sizzix. Layer flowers on a brad, crumple and distress with Coffee Glimmer Mist by Tattered Angels. Attach three flowers to top of heart. Cut two leaves from green patterned scrapbook and attach to either side.

Embellish with rhinestones, pearls and metal charms. Attach patterned and satin ribbons for a hanger. Finish with a bow. Hang and enjoy!

Hop around and take a look at all of the projects that my fellow Designers have created for Valentine's Day by using the DCC navigation on the right hand toolbar.

Thanks for stopping by - Beth

Monday, January 7, 2013

DESIGNER CRAFTS CONNECTION - FIRST MONDAY IN JANUARY!!

HAPPY NEW YEAR!

Today is the first Monday and that means it is our Designer Crafts Connection Blog Hop!  This month's them is HOME DECOR. 

I create quite a few home decor items out of found objects, craft store items and thrifted treasures, so this month's theme is right up my alley!


First, I want to share a set of candlesticks that I created for my mantle.  I had seen chunky decorated candlesticks like this at Pottery Barn and Anthropoloy, but didn't want to spend the money, so I looked around until I found some items I could alter into exactly what I wanted!

Two are thrift store finds and the third I created to match with a candlestick and wooden plaque purchased at the craft store.  They are painted in a distress finish with Americana Paints from DecoArt.  The wire bird and birdcage were also craft store finds and the apothecary jar was made from a recycled salsa jar and wooden knobs.


Second, is a set of silhouette plaques to match the candlesticks!  The plaques are craft store purchases that I distressed painted to create an aged look.  I then covered them with old book pages that I found at a local thrift store.  The silhouettes are a K & Company find from the craft store, but they were originally ivory.  I selected the images I liked the best and lightly sprayed them several times with Design Master Colortool Spray Paint in Flat Black.

Look around, take inspiration from everywhere and create some home decor items that have greater personal meaning - because YOU MADE THEM!

Please visit the rest of the Designers in our DCC Blog Hop ring to see the Home Decor items that they have made by clicking on the HOP FORWARD and HOP BACK buttons on the navigation icon in my right hand tool bar.

Thanks for stopping by!  -Beth


Friday, December 28, 2012

MERRY CHRISTMAS & A HAPPY NEW YEAR!


Just wanted to post a quick share today!

I was featured in the Holiday 2012 issue of Stitch Craft Create magazine with my Peace on Earth Wreath.  Check out their website here and their blog here to get lots of great ideas!

There are three pages of photos along with complete instructions!  I used a technique that was new to me - I wrapped the wreath form in stitched paper ribbon by cutting lenghts of scrapbook paper, crumpling them and then joining them all together on my sewing machine.  The look is very Shabby Chic!

I was also featured in the Winter issue of Crafts n' Things magazine with my Santa Button Beard Pillow.  Check out their website here and their blog here for lots of ideas and inspiration!


This project was special to me because most of the buttons that I used were from my Grandmother's button box.  I painted the Santa face on cross stitch fabric, then sewed the buttons and jingle bell on.  I have this pillow prominently placed on my couch this Christmas!

I wish everyone a Happy, Healthy and Prosperous New Year in 2013!

Thanks for stopping by!  -Beth

Friday, November 16, 2012

FABER CASTELL GELATOS

FAUX LEATHER MASKING TAPE JOURNALS

I worked with these Gelatos from the Faber Castell Design*Memory*Craft line at the CHA Summer Show and then I picked some up in several different color families at Michael's to play with them.  I was looking around my studio for a surface and saw four rolls of masking tape that I had on hand from another project and thought that the tape would make a versatile surface.  I also had some small blank books on hand, so decided to create some colorful journals.


Here's how I made it:
  • Lay out several lengths of masking tape on a workable surface.  I used my Inksentials Craft Sheet from Ranger.
  • Next, just start scribbling - what fun!  I mixed and matched colors, then misted the maksing tape with water and blended with the paint brush included in the Gelatos Mix & Match set.
  • Keep layering and blending until you get the effect you are looking for. This was actually extremely fun and relaxing! Crafting as therapy - LOVE IT!  I blotted some strips with a paper towel and others with my paint brush, but I think that they all look like faux leather!

  • Once all of the masking tape strips are colored and dry, measure your book cover (or surface of your choice) and cut to length.
  • I used the widest strip of masking tape on the spine of the book, so I had enough to wrap around the front and back covers.  Cut a small "V" at the folds of the book and wrap the edges of the masking tape in on inside of the front and back covers.
  • Lay out different colors and widths of the colored masking tape until the front and back covers are completely covered.  Make the final piece of masking tape wide enough to wrap around the inside edge of the book.  Cut the tape at an angle, so the finished edge is as neat as possible.  Then burnish all surfaces with a bone folder (or old credit card) to smooth out and bubbles and create a good adhesion to the surface of the book. 
  • Using the Stamper's Big Brush Pen in Black I inked the clear stamps that came with the Gelatos Mix & Match set and stamped the Damask and Flower pattern on the front cover of my journal books.  I found that the stamping worked better on the masking tape if I lightly misted the stamp after I inked it with the Big Brush Pen.
  • The last step is to measure, cut and adhere a coordinating paper to the inside front and back covers to hide all of the tape edges and finish the Journal.

I am going to be giving out these mini Journals as stocking stuffer Christmas presents.  They are the perfect size to carry in your purse for important notes and ideas!

Thanks for stopping by!  -Beth

Monday, November 12, 2012

WINTER HOLIDAY HOP

Today, I am joining a group of talented Designers in the Winter Holiday Hop, organized by Jen Goode, who is hosting the linky party on her blog.  So, happy to have been invited to share my Holiday Inspiration with everyone today!  Click on the WINTER HOLIDAY HOP button in my right hand sidebar to hop around!
 
I LOVE SNOWMEN, there I have said it!  Isn't admitting you have a problem the first step to recovery?  Well, truth be told, I don't want to recover from my Snowman addiction, but I do want to share with everyone today, some of my most favorite Snowman projects!
 
This Snowman is made from a simple foam ball and painted craft foam pieces.
 
Glass Hurricane Snowman with painted features, a felt hat and plaid scarf.

 
Altered Altoids Tin painted to look like a Snowman on TV with wire and beaded antennae.
 
This cute little Snowman is painted on a hinge from the hardware store!
 
A $1 section basket from Michael's painted with a Snowman face, ear muffs made from the
basket handle and faux fur.
 
Snowmen (and women) treat cups made from peate pots, fabric scrap "carrot" noses and button eyes!
 

Don't forget to click through and see what all of the Designers have made and be inspired to start creating for the Holidays!
 
Thanks for stopping by!  -Beth