

Christmas is certainly one of my favorite holidays of the year because there are SO MANY opportunities for creating and crafting! Each year I design a new Christmas Card that I make for family and close friends. My card this year features some of Ann Butler's Faux Quilting Stamps!
Here's how I made it!
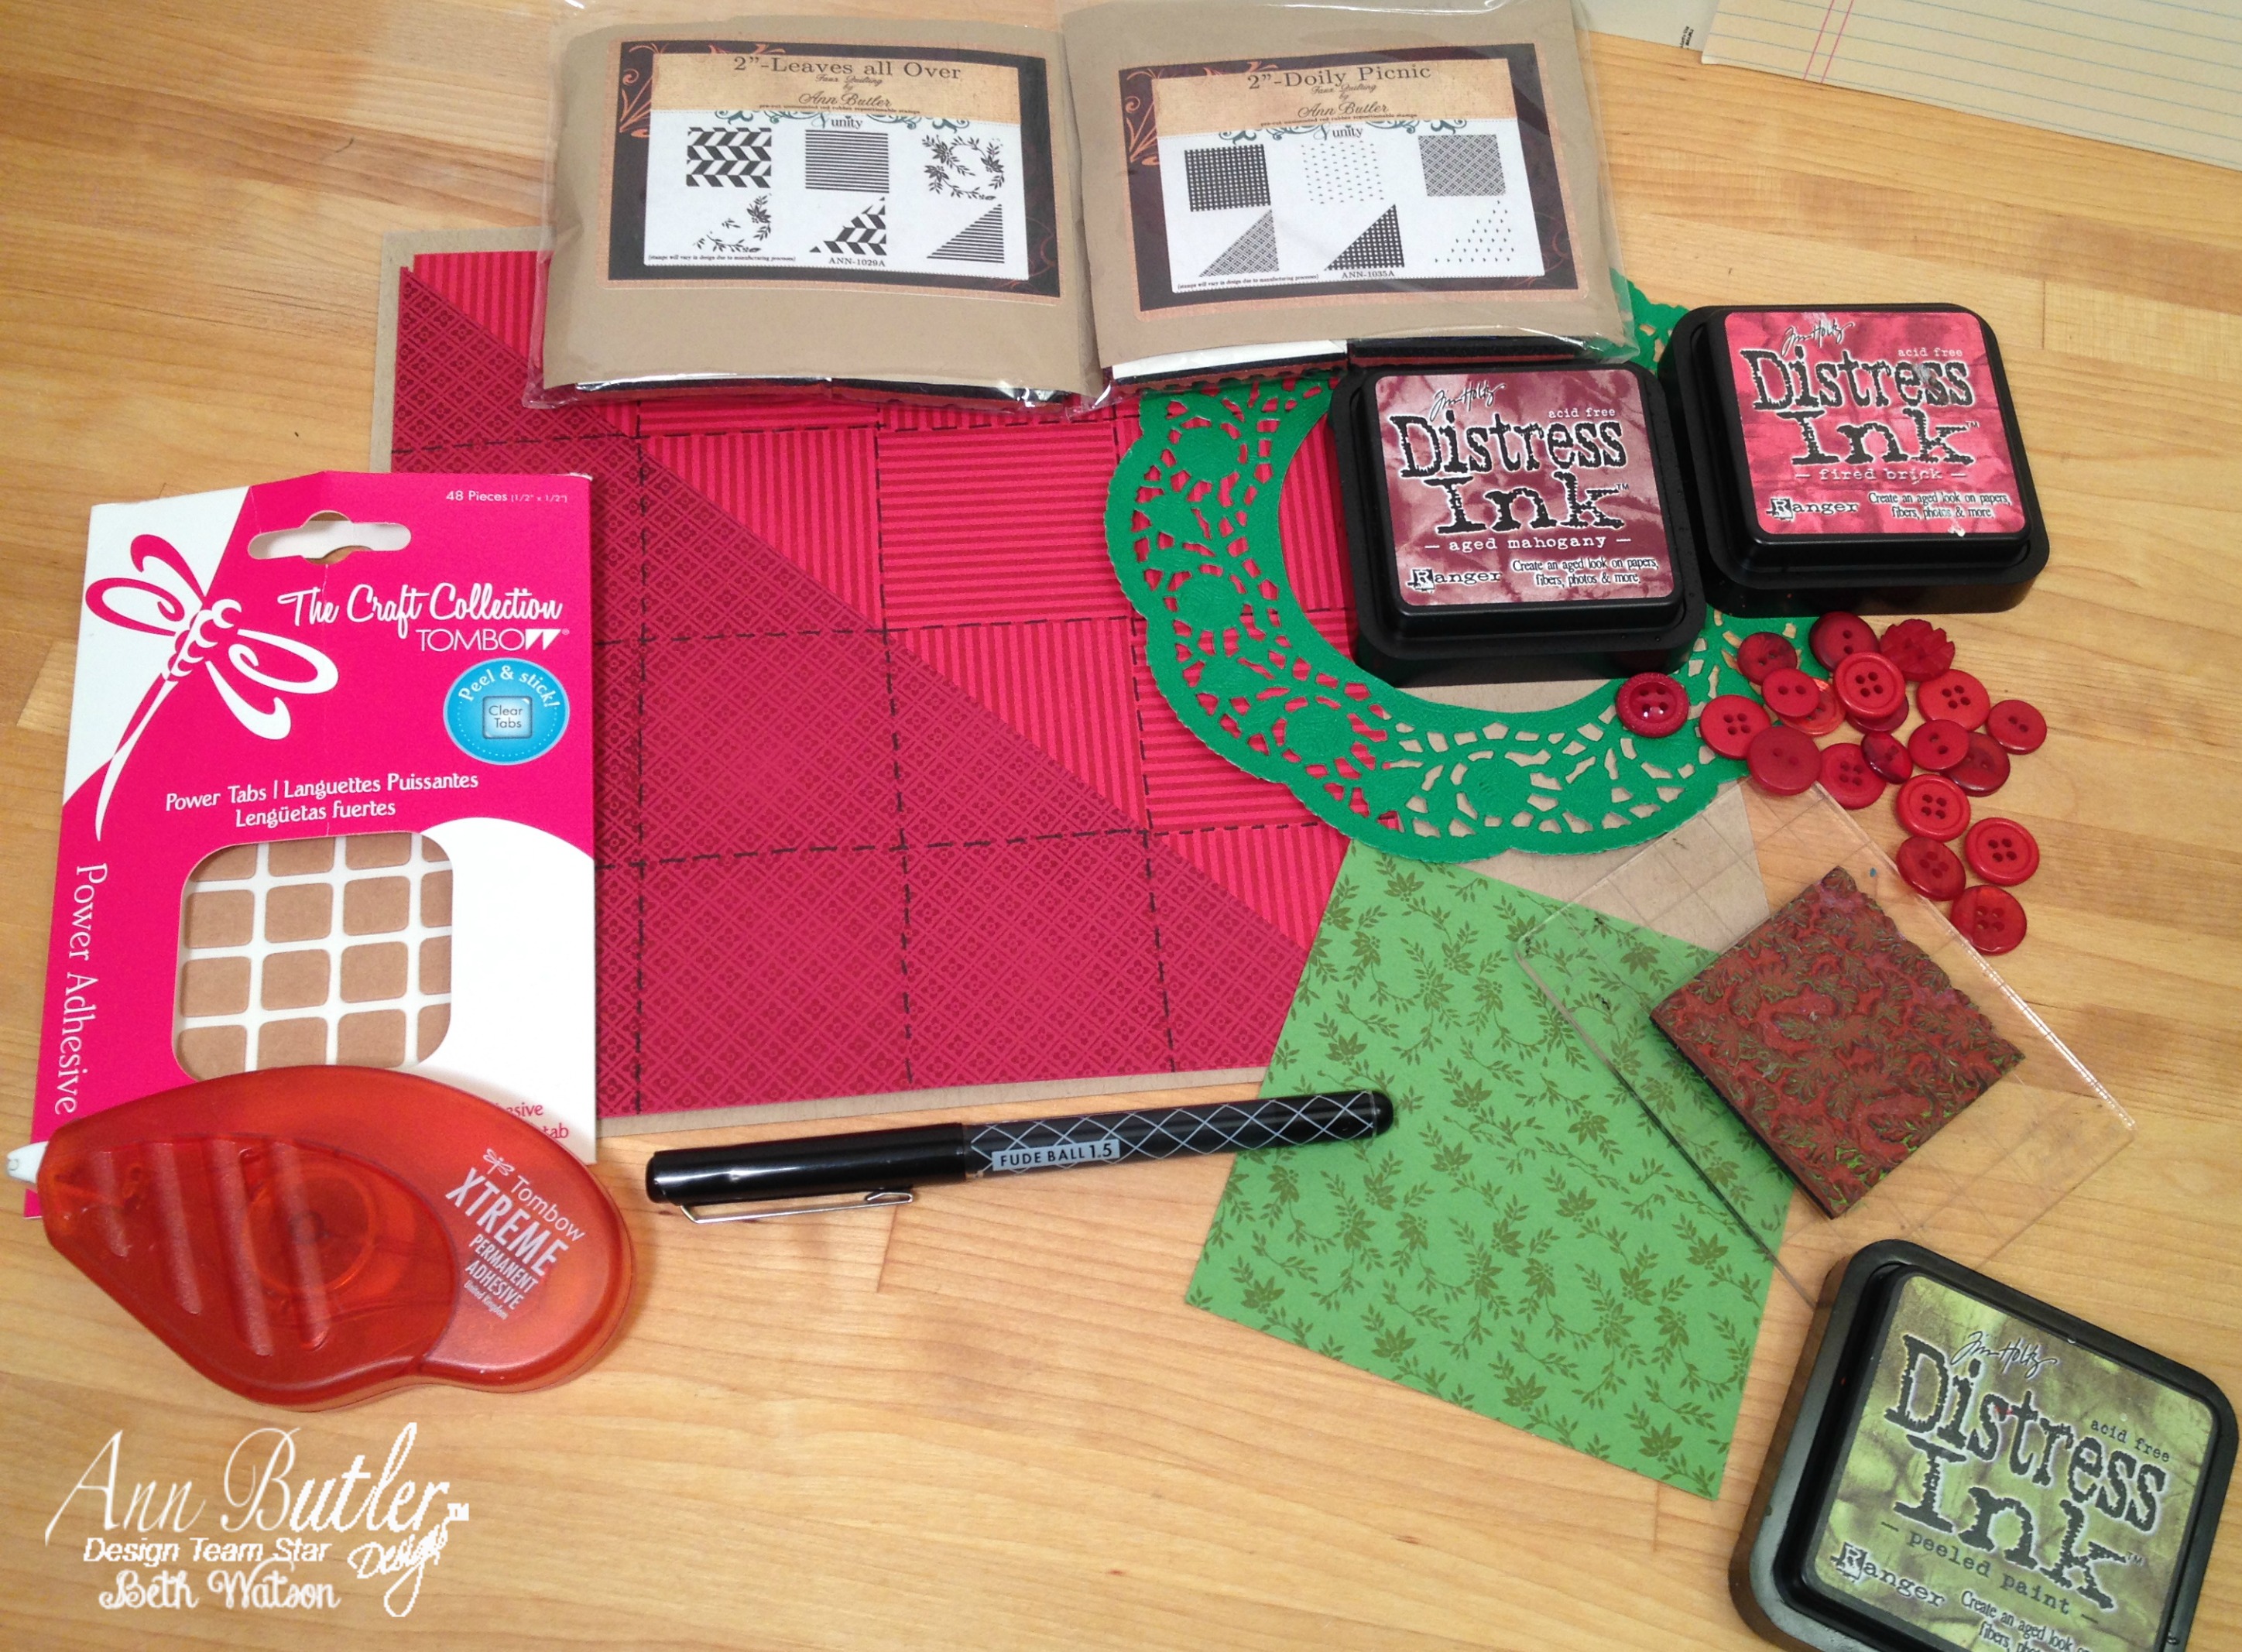
Materials:
Ann Butler {Faux Quilting} stamp sets by Unity Stamp Company – 1″ Leaves All Over and 1″ Doily Picnic
Westcott TrimAir Titanium Paper Trimmer with Ruler, 12" and Westcott Craft Titanium Non-Stick Scissors, 8" Bent
Tombow Xtreme Adhesive and Tombow Power Adhesive Tabs
Tim Holtz Distress Ink by Ranger - Peeled Paint, Fired Brick and Aged Mahogany; Cardstock - Red, Burgundy, Kraft, Light Green; Green Doily; Red Buttons, Fude Ball 1.5 Black Pen; White Ribbon; Merry Christmas and Gold Star cut outs; 'tis the season sticker.
Instructions:
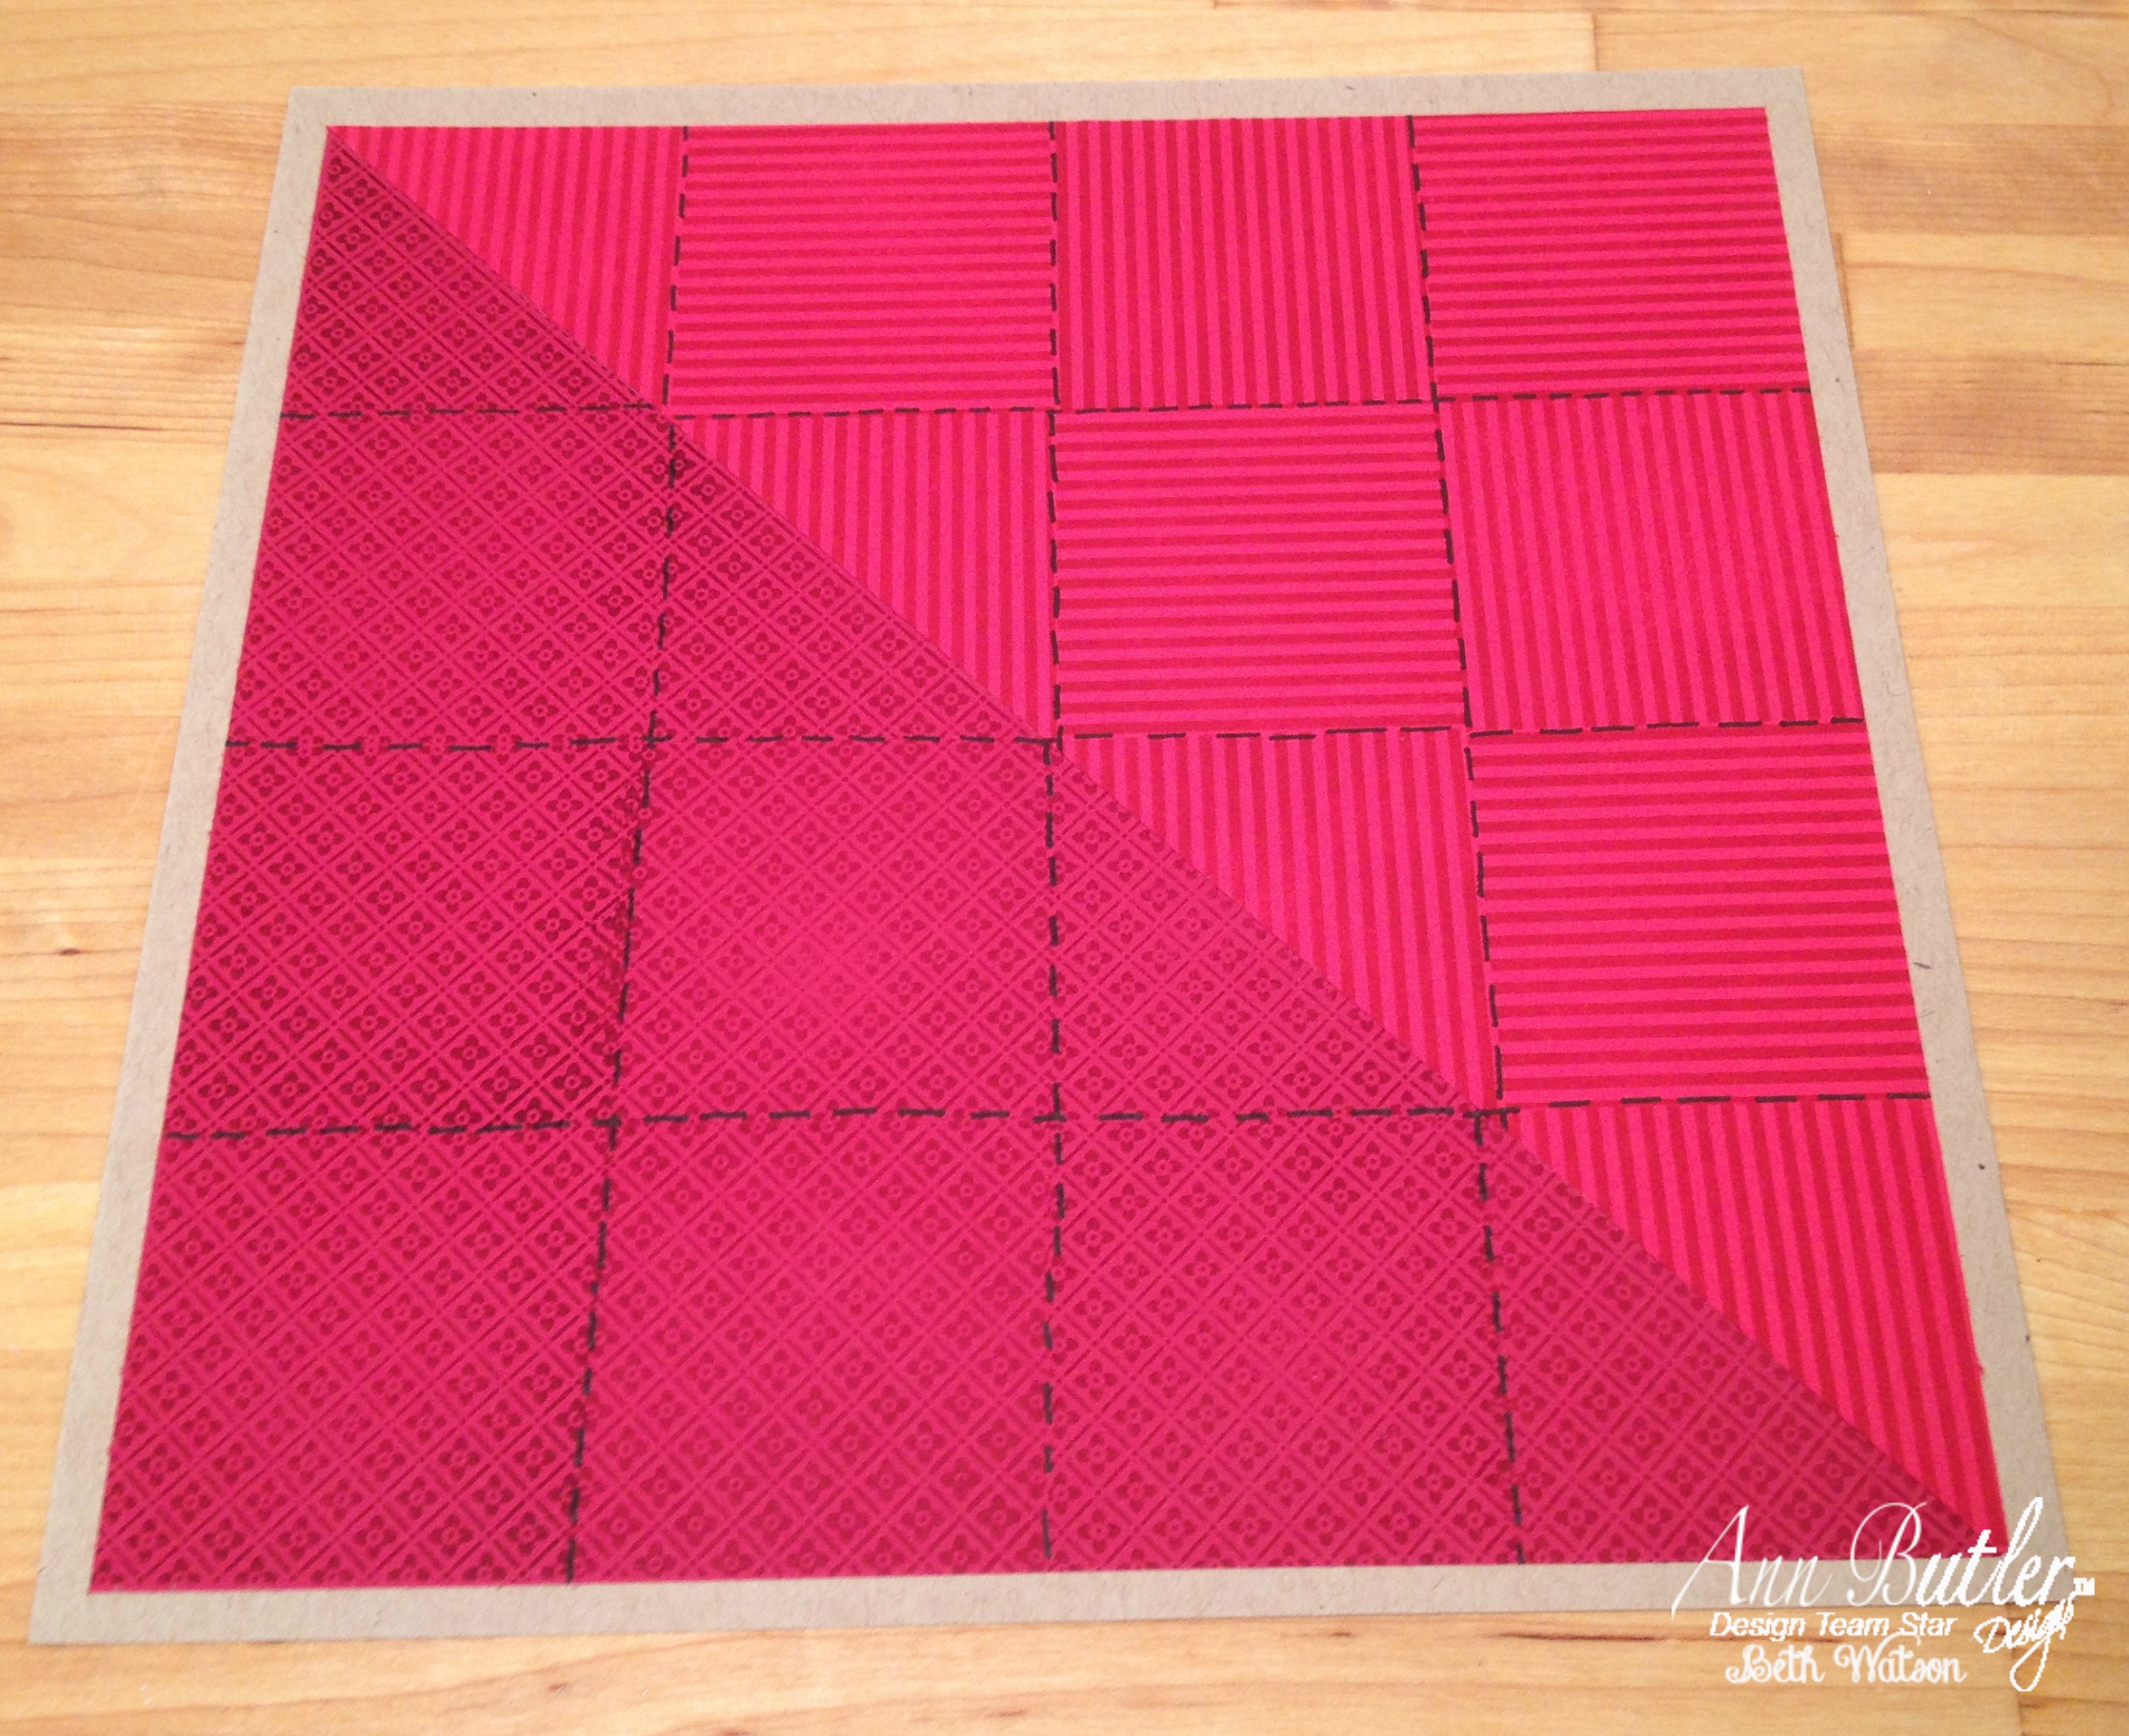
1.) Using Paper Trimmer, cut Kraft cardstock to 12" by 6", score at the 6" mark and fold in half, then set aside. Cut Red and Burgundy cardstock to 6" by 6" squares. Cut Light Green cardstock to 4" by 4".
2.) Place Doily Picnic "Doily" stamp on acrylic block, ink with Aged Mahogany and stamp on Burgundy cardstock until covered. Repeat with Leaves all Over "Stripes" stamp, Fired Brick ink and Red cardstock. Repeat with Leaves All Over "Leaves" stamp, Peeled Paint ink and Light Green cardstock. Cut Red and Burgundy cardstock squares in half diagonally.
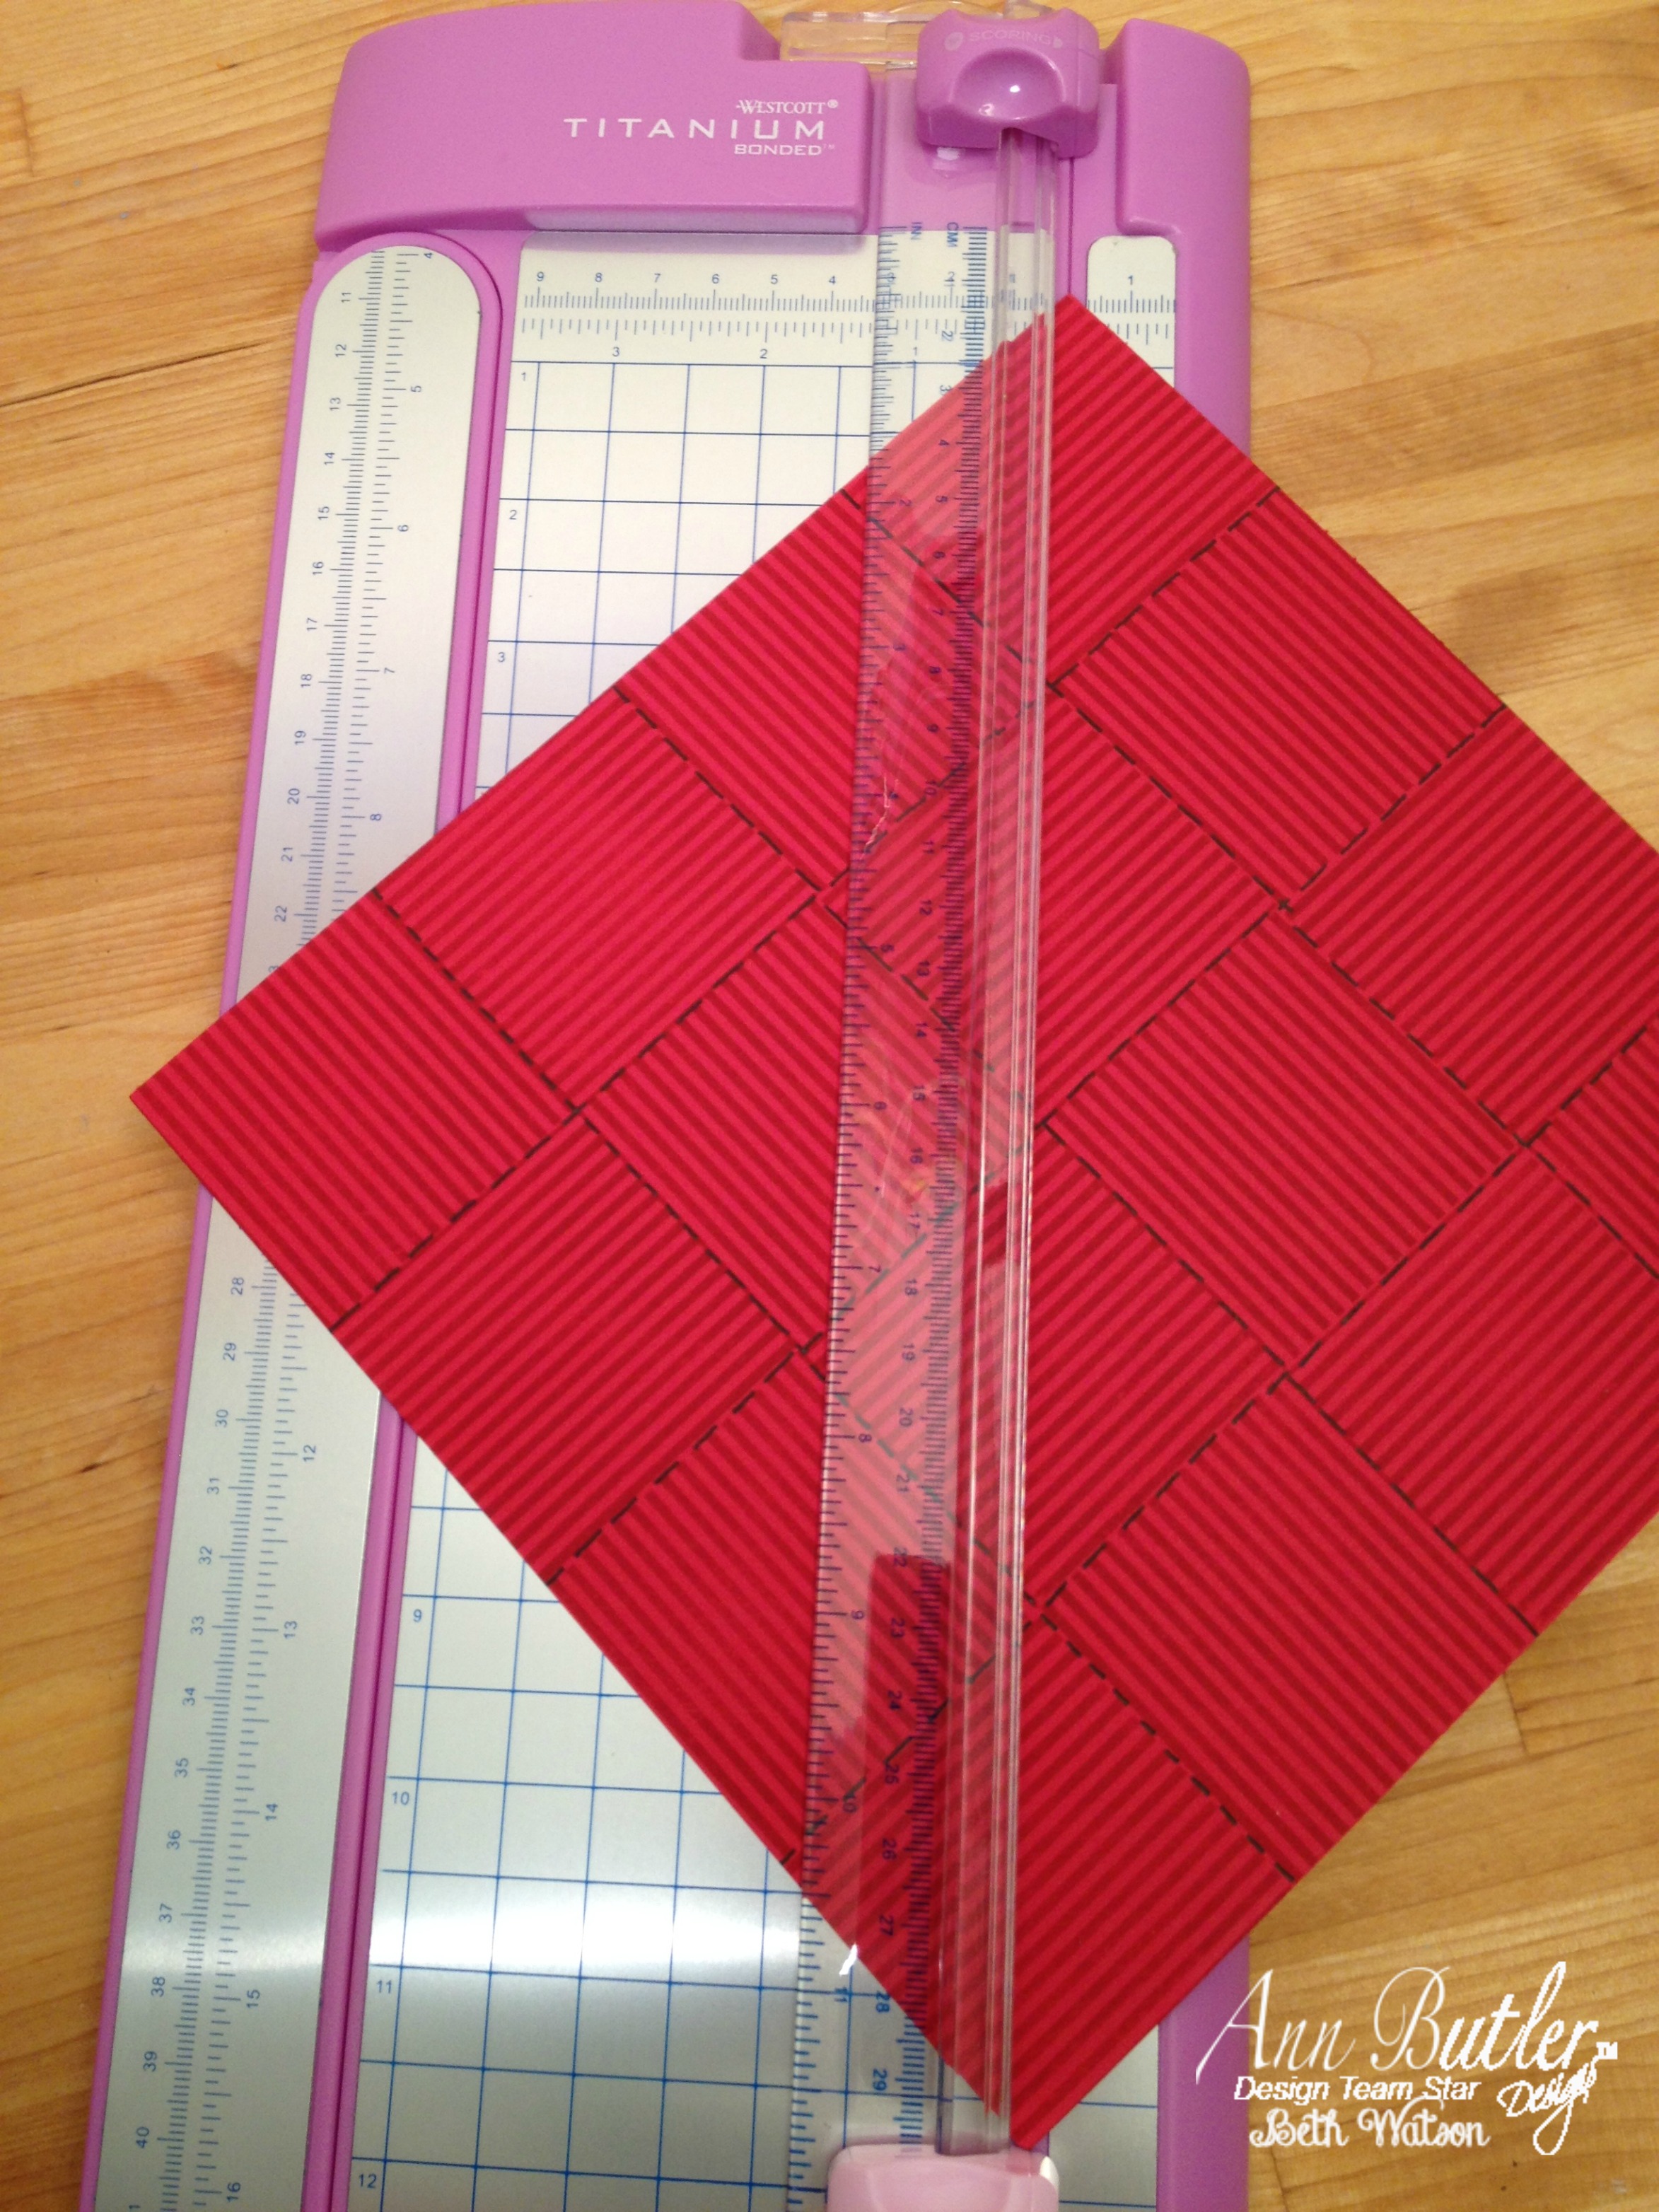
3.) Draw faux "stitches" on Red and Burgundy cardstock with Fude Ball pen. Attach Red and Burgundy cardstock triangles to front of Kraft card with Xtreme Adhesive.

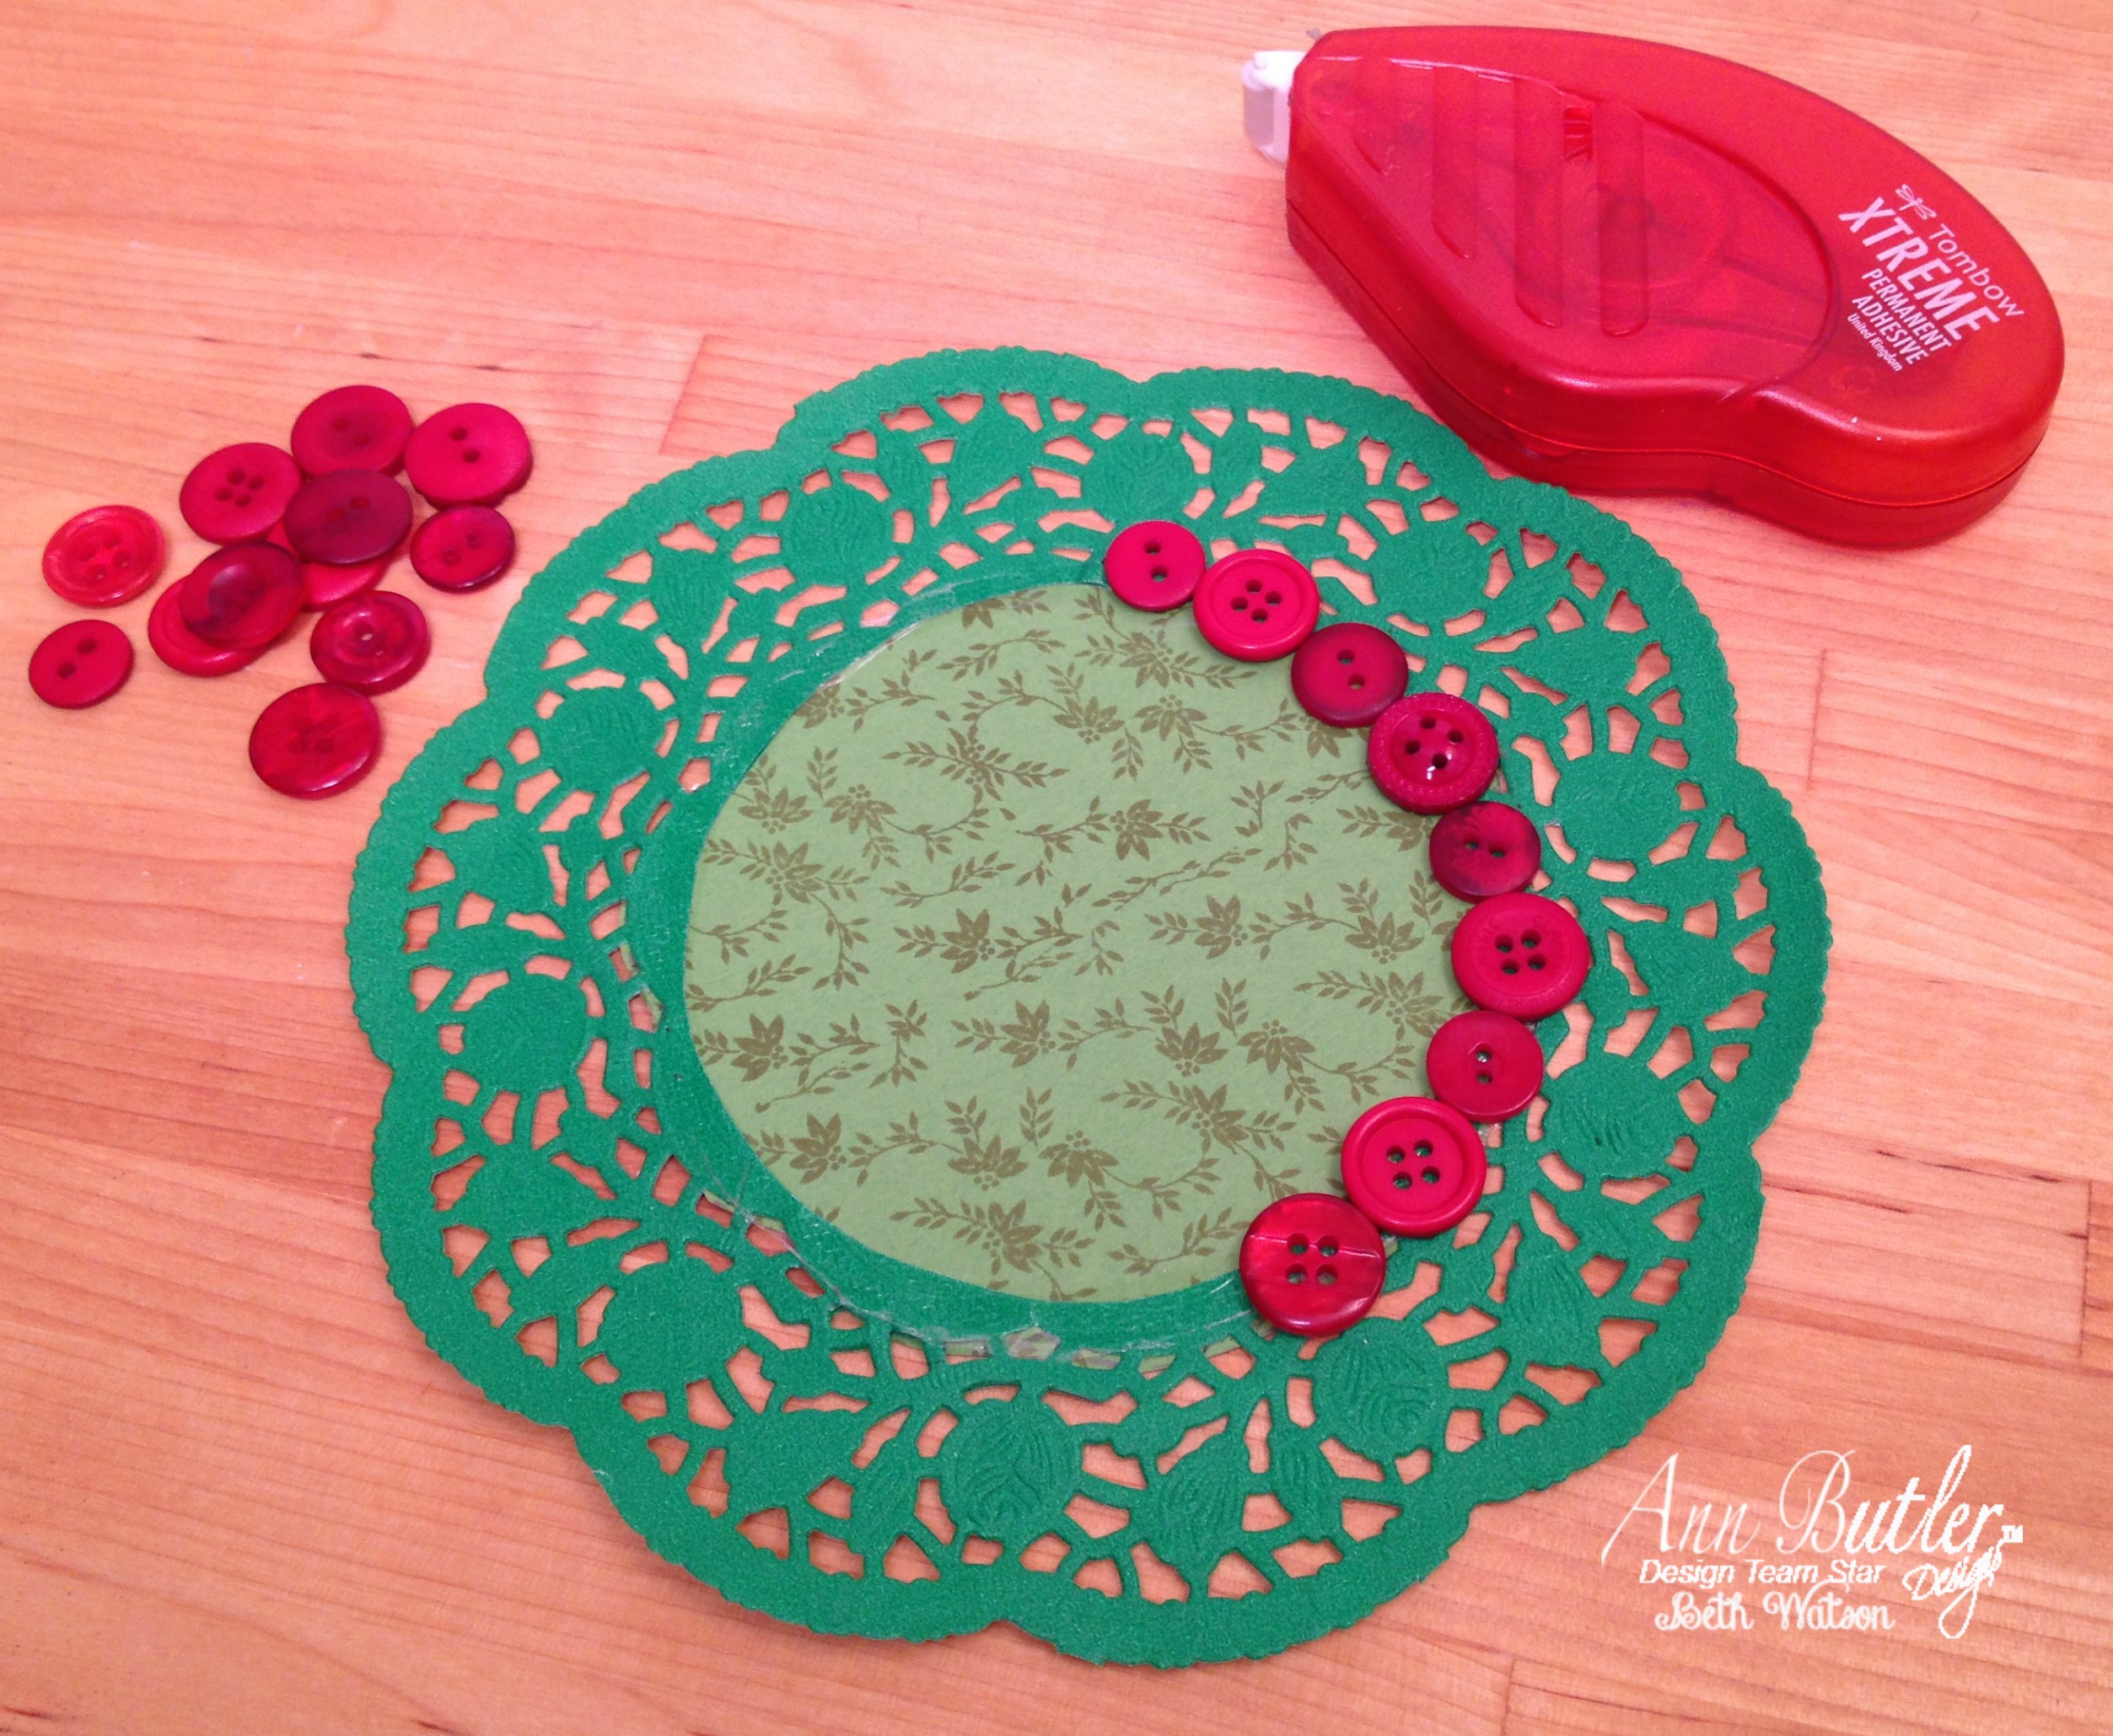
4.) Cut the center from the Green Doily, trace center on to Light Green cardstock and cut out just a bit LARGER than the center. Attach to back of doily with Xtreme Adhesive. Attach buttons to front of doily with Xtreme Adhesive.
5.) Attach cut outs to wreath and wreath to card with Power Tabs. Attach sticker to bottom of card. Tie ribbon in a bow, trim tails and attach to wreath with Power Tabs.

Thanks for stopping by! -Beth


.JPG)


