Tuesday, May 27, 2014

Faux Quilted Butterfly Chalkboard Sign


Excited to be a part of this Ann Butler Designs and Walnut Hollow Blog Hop!

I have been crafting with Walnut Hollow wood products for as long as I can remember.  Great quality wood surfaces, wood burning tools and fabulous customer service!

And by now you all know how obsessed  enthusiastic I am about the Ann Butler Design Faux Quilting Stamps!  While searching and pinning all kinds of quilt patterns and quilt blocks I came across this Butterfly quilt block and fell in LOVE.  It is the PERFECT accent to the Mini Hinged Sign from Walnut Hollow.  Don't you just love it when two worlds collide like that to create a great design?  I know I do!

Now, on to my project!


MATERIALS:
  • Ann Butler Designs {Faux Quliting} Stamp sets - 2″ Diamonds & Plaid and 1" Diamonds & Plaid.
  • Colorbox Crafter’s® Ink by Ann Butler - full size ink pads in Tangelo, Lilac, Aquamarine, Sunshine, Berry and Limelight.
  • Walnut Hollow - Hinged Sign, mini.  
  • Tombow - Xtreme Permanent Adhesive Runner
  • I love to Create - Aleene's® Original Tacky Glue®
  • Americana Paints by DecoArt - Chalkboard Paint.
  • Core' Dinations Core Essentials 6 x 6 Pastel Cardstock.
  • Paint Brush, Acrylic Stamp Block, Scissors, Sanding Block, White Cardstock, Black Wire 24 Gauge, Wire Cutters, Pencil


  • INSTRUCTIONS:
    1.)  Smooth all edges of Hinged Sign with sanding block.  Remove fine saw dust with damp paper towel.  Apply two even coats of Chalkboard Paint, according to directions and let dry for 24 hours.

      
    2.)  Select pastel paper to coordinate with the Ann Butler Crafters Inks, then stamp two 2" Triangles, one 1" Triangle and two 1" Squares.  Use photos above as a guide for placement of stamps on paper.


    3.)  Cut out Faux Quilting shapes and dry fit two sets on work surface until you create the color and pattern combinations that you are happy with.  Attach first set to white cardstock with Xtreme Permanent Adhesive Runner (this stuff ROCKS!).  Cut out with scissors.  Attach wire antennae and second set to backside of white cardstock.  Fold in center to crease and attach to top of Hinged Sign with Tacky Glue, let dry.


    4.)  Write a message on your Faux Quilted Chalkboard Sign and enjoy!

    This sign is so versatile and it could be used in so many different ways - as a cheery greeting in your front entry; as table numbers for a Wedding; as a menu sign in your kitchen or even as a Teacher appreciation gift - the possibilities are endless!

    Here are the links for the Designers participating in our Blog Hop today.  Please hop through and check out all of the wonderful and creative projects!


    There is also an Ann Butler Designs Giveaway - here are the rules to enter:
     
    To Enter for the giveaway please leave a comment.  For each blog you leave a comment on your name will be entered into the giveaway drawing, so be sure to check out the entire Blog Hop for more chances to win!
     

    There is also a giveaway over on the Walnut Hollow blog, so check that out too!

    Thanks for stopping by!  -Beth


    Monday, May 19, 2014

    MAY FLOWERS Hydrangea "Chandelier" Tutorial


    May is here and so are the colorful flowers everywhere.  I have always LOVED hydrangeas, so having the chance to work with the Borders & Hydrangeas die by Eileen Hull was a dream come true.  Now I can enjoy my hydrangeas all year round with this cute "chandelier".

    Materials:
    Sizzix Bigz Die by Eileen Hull - Borders & Hydrangeas
    Sizzix Bigz Die by Eileen Hull - Ribbon 3-D
    Sizzix Bigz Die by Eileen Hull - Leaves
    Sizzix Big Shot Machine
    Smoothfoam balls - 3" (1), 2 1/2" (1) and 2" (1)
    Americana paint by DecoArt -Purple Cow
    Cardstock - four shades of purple, two shades of pink and three shades of green, paper trimmer, ribbon 8" (3), pearl head straight pins, paint brush, mouse pad, Tonic Paper Piercing tool, wooden skewers (3)

    Instructions:
    1.)  Insert skewers in Smoothfoam balls and paint with Purple Cow, let dry by placing in a cup or glass.

    2.)  Trim four shades of purple cardstock to fit just the hydrangea section of the Borders and Hydrangea die (2 1/2" by 6") and die cut.  Repeat with three shades of green cardstock and Leaves die (5" by 6") and die cut.  Repeat with two shades of pink cardstock and Ribbon 3-D die (6" by 6") and die cut.  This is a good way to mix and match and use up your scraps!

    3.)  Turn mouse pad upside down on work surface.  Lay out hydrangea flowers and using the rounded end of the piercing tool or paint brush handle, rub a circle in the center of each flower.  This will give the flowers shape.

    4.)  Layer hydrangea flowers (two at a time) and secure with pearl head straight pin.  Repeat until all three Smoothfoam balls are covered. 
      

    5.)  Fold each section of ribbon in half and secure with straight pin to top of 3" ball.  Repeat and connect all three balls. 
      

    6.) Fold bow section of Ribbon 3-D die in thirds and thread on to a straight pin, trim stem from leaves and thread on to the pin then insert in to the top of the largest foam ball.  Repeat with the middle and smallest foam balls.


    Hang and enjoy!


    If you would like to enter this month's challenge, here is the information.


    You could win an awesome PRIZE!


    The Art with Heart Challenge is a monthly celebration of creativity!  Each month the Inspiration Team will be showcasing their Art with Heart created with Eileen Hull’s innovative Sizzix dies. They will be following a broad theme left entirely open to creative interpretation.  We invite you to play along with us and share YOUR art with heart!

    We want this to be a place for everyone to create, inspire and share.  We would love to see what you can do with Eileen Hull’s fabulous products but this is not a requirement.  Use what ever products your artful “heart” desires.  Art is for everyone so come along and share your Art with Heart!

    We want you all to create freely there are no rules here, just a few simple guidelines…

    1.) Create a new project following the Art with Heart Challenge Theme (however you interpret the theme) OR if you have created something that fits the theme previously create a new post with a photo and link to the original post.  

    2.) Include a link to the current Art with Heart Challenge in your post so others can play along too!

    *Buttons and graphics are available for you to display in your sidebar if you would like to help us spread the word :)

    3.) When linking up your project please include a direct link to your post.

    4.) You are not required to use Eileen Hull Products in your projects.  However, those who do use Eileen Hull products will be given two entries into the prize draw.

    That’s it!  So get going, get creative and share your Art with Heart!

    Be sure to come back each week on Tuesday to see more creative project ideas from the Inspiration Team and check out the latest entries in the challenge.

    Now it’s your turn to share some inspiration by sharing YOUR creations!  You have until May 29, 2014 to link up your projects HERE! for a chance to win the Eileen Hull Picket Fence die as a prize.  The winner and Top 3 will be announced on May 30, 2014.  

    In the meantime the Inspiration Team will be bringing you more creative projects and inspiration every Tuesday on Eileen's Blog HERE!  

    I can’t wait to see your Art with Heart!

    Thanks for stopping by -Beth


    Monday, May 12, 2014

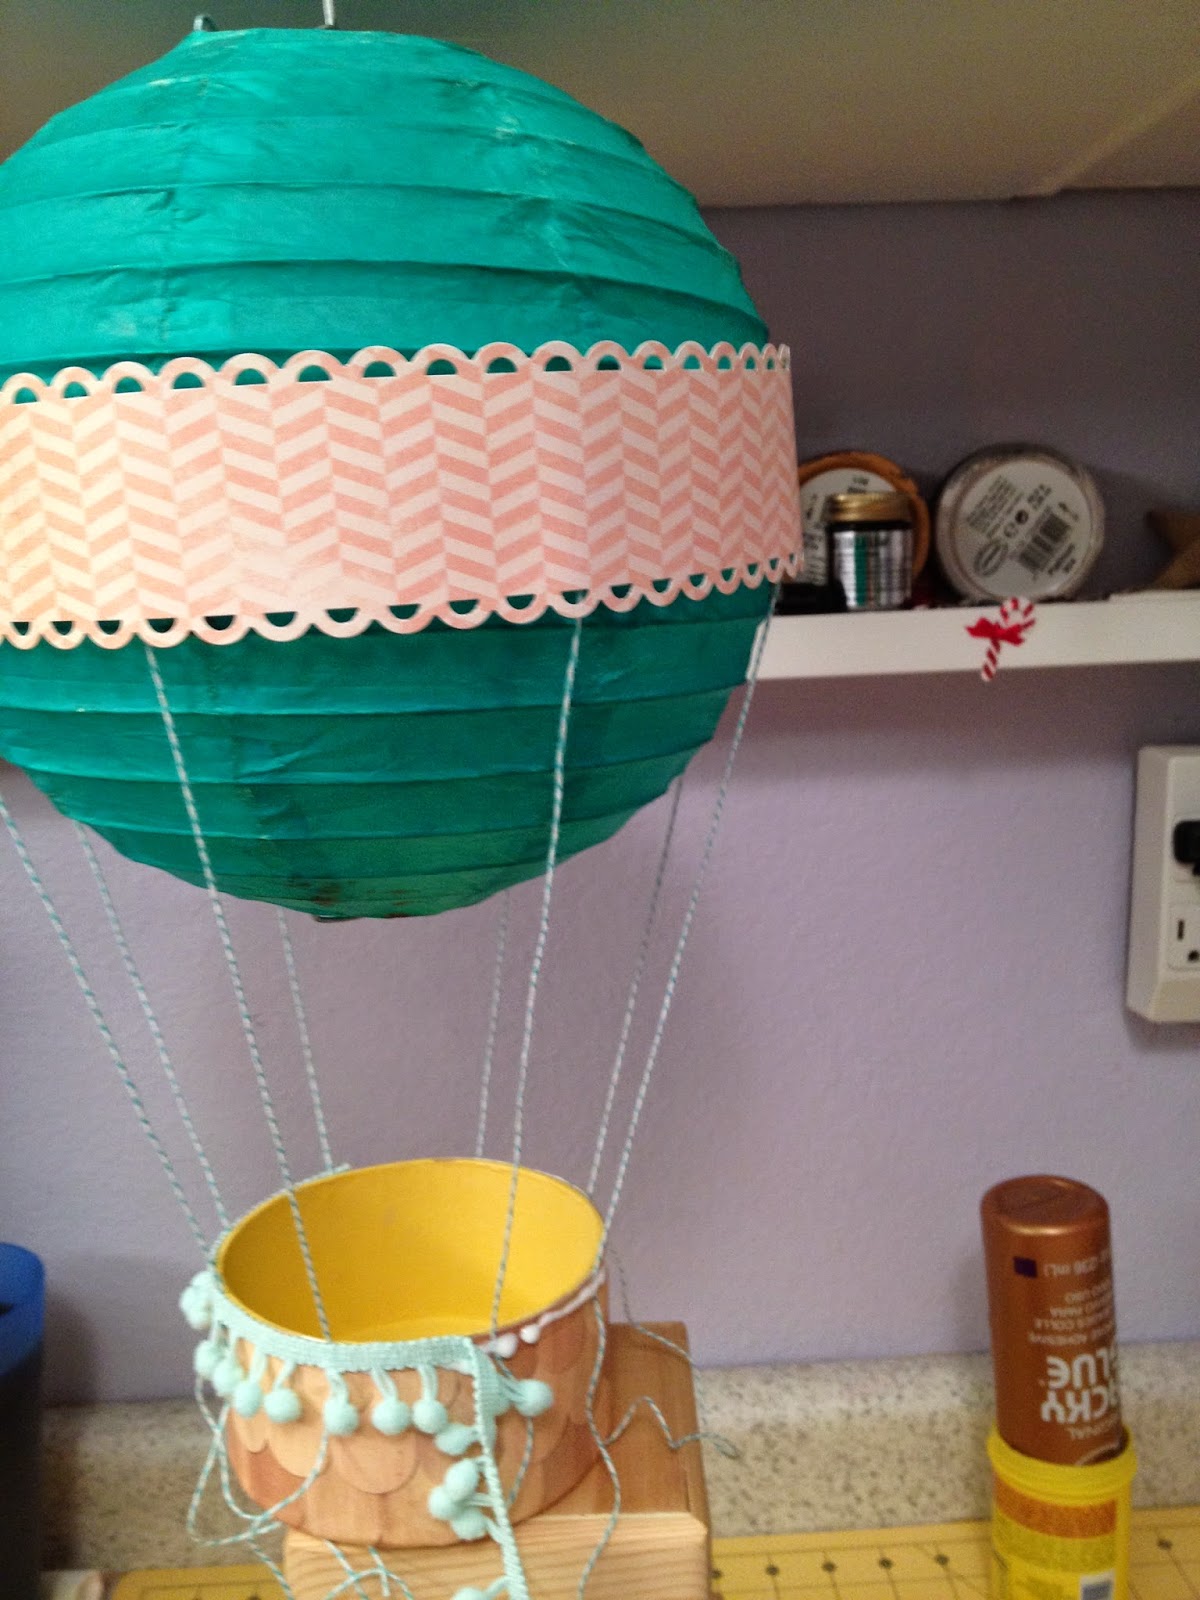
    Hot Air Balloon Tutorial


    I have had this idea for a Hot Air Balloon "floating" around in my head for a while now, but only recently had the opportunity to actually create them.  It all came together quite nicely - I had a Design Team project assignment for Whim So Doodle, so I received these great papers and embellishments from the Oh, Darling! line by Crate Paper AND I found these (originally white) paper lanterns in two sizes from the Dollar Bins at Michael's - KISMET!  

    Materials:
    • Crate Paper - Oh, Darling!  Papers, Stickers and 3D Embellishments.
    • Americana Paints by DecoArt - Moon Yellow, Coral Rose and Indian Turquoise.
    • Aleene's Original Tacky Glue by I Love To Create.
    • Art Anthology - Colorations Spray Mists in Peacock, Timeless and Paprika.
    • Golden Soft Gel Medium Matte.
    • Hazel & Ruby - Assorted Sequins in Pinks.
    • Paper Lanterns - 8" (1) and 4" (2).
    • Paper Mache Box Bottoms (3).
    • Bakers Twine, Ball Fringe (pink & blue), Lace Trim (pink).
    • Border Punches by Fiskars - Threading Water, Bracket and Scallop.  Regular Punches by Martha Stewart - 1" Circle, Starburst, Flower and 1" Square.
    • Flowers, Rhinestones, Pearls, Buttons, etc.
    • Double sided adhesive, paint brush, pencil, ruler, paper trimmer and scissors.

    Here's how it made it:

    1.)  Pop up the paper lanterns and lock in place.  Tint lanterns with spray mists.  I found that the Art Anthology mists covered the best and had the most vibrant color when dry.  Paint the inside of the paper mache box bottoms, let dry.  Measure and cut paper to fit around edge and on bottom of paper mache boxes.  Attach with Gel Medium, let dry. 


    2.)  Measure, cut and punch strips of paper to fit around center of balloon.  Attach 8 lengths of baker's twine to inside of strip with Tacky Glue, let dry.  Adhere paper strip to center of balloon with double sided adhesive tape, press gently to secure.  Adhere baker's twine strings to sides of balloon basket with double sided tape.  Glue ball fringe around edge and trim twine.  Glue remaining pieces of twine to top half of balloon.

    3.)  Embellish balloons with Oh, Darling! stickers, mini flowers, punched flowers, punched shapes, buttons, rhinestones and pearls as you like.


    4.)  Cut out little girls from the Oh, Darling! papers and glue to inside of balloon baskets.


    5.)  Create flag for top of balloon using a wooden toothpick, Oh, Darling! paper and letter stickers.


    6.)  Place blonde girl Oh, Darling! 3D Sticker in the large balloon basket.


    7.)  Since balloons will be hanging, embellish bottom of balloon baskets with Oh, Darling! 3D Stickers!


    The possibilities are endless with the color palettes and themes that can be created - GO WILD and FLY HIGH!

    Thanks for stopping by!  -Beth