Pages
Saturday, December 24, 2011
THE 12 DAYS BEFORE CHRISTMAS - DAY 1
I have been wanted to try out one of these silver trays I have seen all over the web and finally found the perfect tray!
This is a small oval silver plated tray that I found in a thrift store. The decorative papers are all from the Tinsel & Twig line from the Girl's Paperie. I have embellished with a large red glittered MERRY, red buttons, white pearls and green glittered leaves. I finished the tray off with a red hand dyed satin bow and some silver tinsel trim.
I hope you have enjoyed my count down to Christmas projects as much as I have enjoyed sharing them! I wish you and your the most joyous of Holiday Seasons - MERRY CHRISTMAS!!
Thanks for stopping by! -Beth
Friday, December 23, 2011
THE 12 DAYS BEFORE CHRISTMAS - DAY 2
PRESENTS WRAPPED - CHECK!
COOKIES BAKED - CHECK!
CRAFTS FINISHED - "OOPS" - NOT YET, BUT DON'T WORRY BECAUSE TODAY I HAVE TWO CLEVER ORNAMENTS - AND YOUR HUSBAND CAN PICK UP THE SUPPLIES AT THE HARDWARE STORE FOR YOU!
Hinges and Krylon Spray Saint make this one of the easiest ornament ideas EVER! Base coat the Snowman hinges with #8800 White Dual Paint + Primer and let dry. Base coat the Santa hinges with #8804 Burgundy Dual Paint + Primer and let dry.
Use Americana Paints from DecoArt to finish the features and a Krylon Leafing Pen in #9901 18 KT. Gold to accent the details. Seal with Krylon Matte Finish in #1311 Clear to protect your painted surface.
Loop a satin ribbon through the top hole of the hinge and hang on your tree!
Thanks for stopping by! -Beth
THE 12 DAYS BEFORE CHRISTMAS - DAY 3
I love to create personal gifts and treats for all of my family and friends. I had purchased these cute little mittens some time ago at a craft store because they were CUTE! I then turned them into Christmas pins to wear during the Holidays and have attached them to the ribbons on my gift packages this year!
The "head" is a wooden ice cream spoon that has been painted and topped with a fabric hat tied with a piece of embroidery floss. Santa has a fabric heart, button and satin bow on his mitten "body" and the Snowman has a fabric scarf and buttons on his mitten "body". The final step is to glue on a pin back.
The mittens can be found here at Wimpole Street Creations on the web.
Thanks for stopping by! -Beth
THE 12 DAYS BEFORE CHRISTMAS - DAY 4
This snowflake ornament started out as a simple wooden shape from the craft store. I covered it with vintage Dictionary paper and punched a 1" scalloped circle from the same paper and inked all of the edges with grey ink. I stamped "LET IT SNOW" in grey ink and attached it to the snowflake with several layers of dimensional foam adhesive squares. I glued on a silver tinsel pipe cleaner stem, small Mother of Pearl buttons and silver beads - to add sparkle. I then took my Crop-a-Dile and punched holes around the edges to create additional interest. I stamped 2011 on the back of the snowflake in grey ink.
I have made a whole bunch of these this year and will give them to family and friends this Holiday Season!
Thanks for stopping by! -Beth
THE 12 DAYS BEFORE CHRISTMAS - DAY 5
I covered a 2" wide coaster with vintage music and inked the edges with dark brown ink. I then stamped a circular row of light green holly leaves and dark green holly leaves. Using a cute typewriter font stamp set, I stamped "holly daze" in the center with dark brown ink and highlighted it with glitter glue. I finished the ornament with red rhinestones, a red satin ribbon bow and a hanger - now it happily lives on my Christmas tree!
Thanks for stopping by! -Beth
Monday, December 19, 2011
THE 12 DAYS BEFORE CHRISTMAS - DAY 6
My project for today is a Super Glam Snowman ornament that is super easy to make!
I started out with three 2" Styrofoam Balls, painted them with Aleene's Original Tacky Glue and rolled them in a paper plate full of white glitter. Shake them off and let them dry, then just fold the paper plate in half and pour your glitter back into it's container! Cut a 24" length of white satin ribbon and tape the folded end to the blunt end of a wooden skewer. Thread on a bead or button (any kind because it won't show) and knot the loose ends of the ribbon. "Thread" the Styrofoam balls on to the ribbon, so they are touching, thread another bead or button on the top and secure with a dot of glue.
Using Inksentials Wonder Tape by Ranger in a 8" by 10" sheet, cut out six coal eye, three carrot nose and twelve coal mouth shapes. Peel one side from the three carrot nose shapes and push firmly into a paper plate of chunky orange glitter. Peel second side from carrot noses and place one on each Styrofoam ball. Peel one side from the six coal eye and twelve coal mouth pieces, push into a paper plate of black chunky glitter. Peel second side from coal eyes and place two coal eyes on each Styrofoam ball. Peel second side from coal mouth pieces and place four on each Styrofoam Ball.
Using Decorative Chalks or left over blush, give each snowman two rosy cheeks. Cut two 6" and two 4" white feather trim pieces. Glue two 4" pieces around the buttons at the top and bottom of the snowmen. Glue two 6" pieces between the snowmen.
Hang on tree for a Glam Holiday!
Thanks for stopping by! -Beth
THE 12 DAYS BEFORE CHRISTMAS - DAY 7
THE 12 DAYS BEFORE CHRISTMAS - DAY 8
Hope you enjoy - they are almost yummy enought to eat!!
Flaten the bottom of a satin covered ornament by pushing down and twisting on your work surface. Hot glue the bottom and then edge in a paper cupcake liner. Ice the cupcake with 3D Fabric Paint like the Tulip brand from ilove to create. Smooth with a palette knife or plastic knife. Sprinkle with glitter, shake off excess and set aside to dry. Drying may take up to 24 hours based upon how thick a layer of "icing" you use.
Once dry, tie a section of gold cord or ribbon for the hanger and hot glue two metallic pom poms to cover plastic hanger loop.
Hang on the tree and give as gifts. The bottom of the cupcake makes the perfect spot for your child's name and the date!
Thanks for stopping by! -Beth
Friday, December 16, 2011
THE 12 DAYS BEFORE CHRISTMAS - DAY 9
They do look good enough to eat, though!
Cut shapes from tan craft foam - I prefer the Foamies brand from Darice - or use a cookie cutter to trace your pattern. I started with a heart. Ink the edges of the "cookie" with Chestnut Roan fluid chalk ink by ClearSnap to give that fresh baked look. Fill in the "icing" with Tulip 3D Fashion Paint in Slick Deep Red, outline and dot in Metallic White, then draw a squiggle circle in Slick Pistachio Green. To finish, place a Silver Metallic bead in the center to resemble a confectionary dragee and sprinkle with clear glitter. Once dry, glue a gold or silver cord to the back for hanging!
The candy cane is just as easy. Cut your candy cane cane shapre from the tan craft foam and ink the edges. Starting with Slick Deep Red, outline the stripes on the candy cane and fill in. Next outline and fill in the white stripes with Metallic White. Draw a line of Slick Pistachio Green in the center of each white stripe and place the silver metallic beads on the red stripes. Sprinkle with clear glitter. Once dry, glue a gold or silver cord to the back and hang on the tree.
These cookies make great gift tags as well - just write your TO and FROM on the back!
Delicious decorations and easy to bake, I mean create, too!
Thanks for stopping by! -Beth
THE 12 DAYS BEFORE CHRISTMAS - DAY 10
SNOWMAN TV - an altered Altoids tin makes the perfect Christmas Tree ornament AND Gift Card holder!
Create one for each member of your family featuring Frosty and all of his friends!
Thanks for stopping by! -Beth
Wednesday, December 14, 2011
THE 12 DAYS BEFORE CHRISTMAS - DAY 11
Today I am sharing a Christmas Tree and Ornament made from empty ribbon spools and paper scraps - I never throw anything away!
Stack the spools in largest to smallest order, cover with decorative papers and embellish with buttons, stickers, rhinestones, glitter and pearls! Glue all of the spools together. Tie with red and green ribbon, then I made a paper rosette for the topper. I used a very graphic paper line from Making Memories from last year, but this project would look lovely with some of the vintage papers that are out this year.
Follow the same steps for the Ornament, but thread the ribbon through the center of the spools (once glued) string on a crystal and thread the ribbon back up to the top. Then tie in a bow and hang on the tree!
A quick and easy project that is great for clearing out your stash!
Thanks for stopping by! -Beth
Tuesday, December 13, 2011
THE 12 DAYS BEFORE CHRISTMAS - DAY 12
I have had this cute little basket laying around for a while, just waiting for a project, but I have seen similar baskets in the $1.00 section at Michael's.
I based coated the lid with Titanium White, the handle with Lamp Black and the Band in Hauser Dark Green. Using a detail brush, I painted the nose with Jack-O-Lantern Orange, the snowflake with Winter Blue, the coal eyes and mouth with Lamp Black. The plaid "scarf" was created with the same detail brush and stripes of Hauser Light Green, Country Red and Titanium White. I watered down some Lamp Black and painted the detail on the carrot nose. I always use Americana Acrylic Paints by DecoArt because they have the best coverage! The cheeks were tinted with Pebbles Decorative Chalks.
Using my Marvy Clever Lever Extra Jumbo Circle Punch (yellow) I punched out two 1 1/2" circles from red cardstock, glued the red feather trim to the cardstock with Aleens Tacky Glue by i love to create and then the cardstock to either side of the handle to create the snowman's "ear muffs". Glue 2 black buttons on the front of the basket. Last step is to glitter the snowflake with Ranger Stickles in Diamond.
Fill your snowman basket with a candy treat or gift card - Merry Christmas!
Thanks for stopping by! -Beth
Thursday, December 8, 2011
PANTONE'S 2012 COLOR OF THE YEAR!
Today is the day!
Pantone's pick for "Color of the Year"!
Drumroll please - the color of the year for 2012 is....
TANGERINE TANGO
According to the official announcement, the deep red-orange color is intended to give us all a big energy boost; a refresh and a recharge.
Leatrice Eiseman, executive director of the Pantone Institute tells us more about the choice for 2012:
"Sophisticated but at the same time dramatic and seductive, Tangerine Tango is an orange with a lot of depth to it. Reminiscent of the radiant shadings of a sunset, Tangerine Tango marries the vivaciousness and adrenaline rush of red with the friendliness and warmth of yellow, to form a high-visibility, magnetic hue that emanates heat and energy."
Color Combo #1: Red-Orange and Gray-Brown
A highly-usable color for interiors. It's very easy to incorporate into a room as an accent, although the full wall treatment (as shown above) is absolutely an option for those willing to take the plunge, as it can be easier to coordinate with than reds with a cooler, blue tone.
Color Combo #2: Red-Orange and Cream Bathroom
Red-Oranges work easily with white and warm neutrals, such as creams and gray-browns and can look fantastic with other strong colors - it's great in combination with pale blue, other "true" oranges (think pumpkin) and also army green.
What do you think of the choice?
Are you ready to try the "tangerine tango"?
Monday, December 5, 2011
DESIGNER CRAFTS CONNECTION - FIRST MONDAY IN DECEMBER
The Designer Crafts Connection was challenged with a Sock Monkey Blog Hop this month and I love to see the creativity that this group shares! AMAZING!
There are basic instructions for making a sock monkey that include the cutting and the sewing of the Rockford Red Heeled Socks and The When Creativity Knocks DVD "Sock Monkeys Go BanAnas" was a fabulous source of inspiration! I was originally going to sew up my sock monkey traditionally, then dress him as a snowman, but then I thought - why not make him an actual snowman?
I sewed the face and ears according to the basic instructions, then sewed on buttons for the eyes, "carrot" nose and mouth. I stuffed the head with a 4" Styrofoam Ball and some fiberfil to round out the head and muzzle. I stuffed the body with a 5" and a 6" Styrofoam Balls, then stitched the bottom closed. I added the red yarn pom pom to the top of his hat, a red felt scarf, the three buttons and CHILLY was born!
My sock monkey package also included a sock monkey stamp.
Rit Dye is a sponsor of this challenge as well, however, I love the brown of the socks so I chose not to dye anything this time.
There’s a contest you can enter until December 19th to win a sock monkey package worth over $40!
Prize pack includes:
■ DVD “Sock Monkeys Go BanAnas"
■ 1 pair of Rockford Red Heeled Socks
■ Sewing kit, including: needle, button eyes, floss and stuffing
■ Plus 1 pre-sewn sock monkey
Here’s how to enter:
1.Go to the When Creativity Knocks website.
2.In the Member Login box click Create An Account.
3.Enter the code: Sock Monkey
I would like to send out a special thank you to all the sponsors of this challenge:
■ When Creativity Knocks
■ Rockford Red Heeled Socks
■ Rit® Brand Dye
■ Judikins
To view the rest of the creative and imaginative Sock Monkeys please HOP around to the other Designer's blogs by clicking either HOP BACK or HOP FORWARD on the Designer Crafts Connection navigation icon on my right sidebar and ENJOY!
Thanks for stopping by! -Beth
Friday, December 2, 2011
SNOWMAN TREAT CUPS
I took some peate pots that hadn't been used and painted them with this new paint line from DecoArt - Glamour Dust Glitter paint in Ice Crystal - LOVE this stuff! Very good coverage and very sparkly (even though you can't tell from my photo). Attached black button eyes and a carrot nose made from a scrap of orange calico fabric. Chalked on a cheek with Pearlescent Jewel Tone Chalks from Pebbles and drew in the features with my trusty Sharpie Marker. Attach a stem of pine to the top edge and some twisted white wire for the handle. Fill with your favorite treat or gift card and you are good to go! I think a dozen of these took me only an hour to complete. A great project to do with the kids as well!
Thanks for stopping by! -Beth
Monday, November 7, 2011
DESIGNER CRAFTS CONNECTION - FIRST MONDAY IN NOVEMBER
Our theme for the November Designer Crafts Connection blog hop is - HOLIDAYS!
This month I selected Thanksgiving!
Each year since my Niece and Nephew were old enough to color, cut and glue, we have made placecards for each member of the family for our Thanksgiving Day feast. This year the design has been elevated to a new level because at 8 and 11 - they told me they needed a challenge!
The placecards we created are full of patterned paper pieces, which are from an old stash of We R Memory Keepers paper that is no longer available, but their new line Autumn Splendor would work just as well. We also used Clever Lever Punches from Marvy Uchida, Aleen's Tacky Glue from i Love to Create and 3D Foam Adhesive Squares from Therm-o-Web.
1.) Cut a 4" wide by 8" long rectangle and fold in half. Glue tan rick rack to bottom edge and spell name with brown letter stickers.
2.) Punch one 3" scallop circle, one 2 1/2" plain circle and one 2" scallop circle from coordinating patterned papers.
3.) Using a Jumbo XL Woodies Tear Drop as a template, trace and cut out six "feathers" from coordinating patterned paper.
4.) Cut triangle for beak from scrap of golden yellow paper, draw two dots at top with black marker and cut waddle from scrap of red paper.
5.) Cut orange chenielle stem in two 4" pieces and two 2" pieces. Twist short piece around long piece to create legs. Glue to placecard, so name is visible.
6.) Attach "feathers" with 3D foam tape and layer three punched circles with 3D foam tape.
7.) Attach 2 small self adhesive black pearls to 2 small white buttons to create eyes and glue on turkey. Attach waddle to beak and beak just under eyes.
Instead of going out and purchasing supplies for a craft like this - use googley eyes, felt, fabric, feathers and any other materials that you might already have to create these cute Thanksgiving Turkey placecards!
Julie McGuffee has a fantastic giveaway on her blog today - a Sizzix Sidekick and two sets of Alphabet Sizzlets, "Girls are Weird" and "Script". To enter to win, check out each project in the DCC webring and as you hop around, note how many designers have used a die cut shape on their project. It can be any die cut shape. Leave your answer in the comments of Julie's blogpost, then check back on Julie's blog on November 16th to see if you're a winner!
Designer Crafts Connection now has a Facebook Page at https://www.facebook.com/DesignerCraftsConnection so LIKE our NEW Designer Craft Connections Page on Facebook and you will learn about our challenges, giveaways and announcements. Don't forget to share with your Facebook friends so they can join in the fun!
Thanks for stopping by! -Beth
Thursday, October 27, 2011
MONSTER EYES
I made these scary Monster Eyes out of inexpensive paper lanterns from Michael's. A quick and easy project to make with the kiddos!
Using Americana Paints by DecoArt, paint a large green circle with Pistachio Mint, a smaller circle with Lamp Black and top coat with Twinkles Lime Green. A Red Sharpie does the trick to make the eyes blood shot!
Create multiple sets in different colors and hang them from your trees and bushes in the front of your house for a scary Halloween night!
Thanks for stopping by! Beth
Tuesday, October 25, 2011
CAT IN THE HAT COSTUME WITH NORVAL THE FISH CANDY BUCKET
My niece, Lindsay, simply LOVES all of the Dr. Seuss books, so several years ago for Halloween she decided to be the Cat in the Hat. We we trying to figure out what she would carry as a candy bucket and while reading the book, she annouces "Aunt Beth, you need to make me a fishbowl with Norval inside!"
After looking at all of the fishbowls on the market and deciding that glass was not a good option, I noticed the black witches cauldron sitting on my kitchen counter and realized it had the same shape as a fishbowl.
I taped off the handle with blue painter's tape, then base coated the plastic cauldron with Krylon Fusion for Plastic® spray paint in Dover White and let it dry. I then hand sketched a water line and Norval the fish on the side of the now white "fishbowl". I used Americana Paints by DecoArt in Baby Blue for the water and Canyon Orange for Norval. After the paint was dry I inked in the lines with my trusty black Sharpie Marker and Norval just came to life!
Lindsay was so happy that every year I have to make a candy bucket that coordinates with her costume!
Thanks for stopping by! -Beth
Tuesday, October 18, 2011
RECYCLED LIGHT BULB JACK-O-LANTERNS
I have made these recycled light bulbs into snowmen and Easter rabbits in the past, but also thought they would be cute as Jack-o-Lanterns!
LOVE the way they turned out!
Start off with Americana paints by DecoArt and base coat the lightbulb with Jack-O-Lantern Orange and the screw top part with Mink Brown. Sponge on Canyon Orange to define the pumpkins ribs and Country Red for the cheeks, let dry. Draw on the face with a Sharpie marker and accent with dots of Titanium White using the blunt end of your paint brush. Paint a wooden star with Moon Yellow and write BOO! Glue lightbulb on small grapevine wreath. Knot the center of a piece of green checkered fabric, glue to "stem" and glue star on top. Set him on a shelf or give as a gift!
Thanks for stopping by! -Beth
Monday, October 17, 2011
SIZZIX FRESH VINTAGE BLOG HOP - SCOREBOARD BIRD
I am always so honored when Eileen Hull asks me to participate in her new release hops and this time around is probably the most exciting one to date! The new Fresh Vintage line is a fantastic series of dies - I honestly don't know how Eileen keeps coming up with these amazing ideas. Today's featured die is the Scoreboard Bird. It's a fun, trendy 3D bird that can be cut out and put togehter quickly from a great variety of surfaces!
I received a box full of product from Melissa Frances which inspired me to put a shabby chic spin on my design.
I carry a sketchbook around with me every where I go to jot down ideas, insiprations and sketches that eventually morph into more formal drawings and finished designs. Here is the sketch that inspired my project today.
Now on to my project!
Start with a 12" Styrofoam wreath form. Cut twelve 1" strips from Melissa Frances Simone, Alma, Esther and Anastasia papers, so you end up with 48 paper strips. Crumple the strips, straighten them out then sew all strips together (end to end) while folding the paper to create one long paper "ribbon".
Glue one end of the paper ribbon to the wreath and wrap completely until fully covered. Wrap sections of tulle, Melissa Frances ball fringe and crocheted lace randomly around the wreath.
Cover two 5 1/2" by 5 1/2" piece of ivory mat board from the Sizzix Little Sizzles Mat Board Pack with Mod Podge a layer of crocheted lace, let dry. Die cut bird twice, once with lace up and once with lace down using the Sizzix Big Shot machine, punch out pieces.
Cover a 3" Styrofoam ball with vintage atlas paper, let dry. Cut a 20" piece of heavy wire, slide through the Styrofoam ball, then glue bird bodies together with wire in the center. Use a button at the bottom of the Styrofoam ball, looping the wire back through the button hole to secure. Insert wire through the top and bottom of the wreath and bend back in a "U" to secure.
Create a "PEACE" pennant with Melissa Frances Attic Treasures sticker book and glue to back of bird by beak. Create a "ON EARTH" banner and glue to the front of the Earth. Die cut a Sizzix Originals Die - Mistletoe from silver glitter paper and color with green Copic Marker, then trim and glue to beak. Embellish with Melissa Frances Resin Crown and Pearls.
Would you like a chance to win the Fresh Vintage Flower Layer #9 die? All you have to do is head over to the Oh My Crafts! Blog and answer a question about today's blog hop to enter! It's that easy! To continue on the Fresh Vintage Blog Hop, please use the widget on my right sidebar and click Back or Forward - you will continue along through the other designers' blogs that are highlighting this fantastic Scoreboard Bird die. Join us every Tuesday and Thursday until November 3rd for tons of great ideas from a talented group of Designers. Thanks to the incredibly talented Eileen Hull for putting together such an inspiring hop!
Thanks for stopping by! -Beth
Friday, October 14, 2011
SPIDERWEBS WITH BUTTON SPIDERS
I have seen versions of these Spiderwebs all over the Internet recently and wanted to create a few, so I made a set!
I started out with three embroidery hoops and three crocheted lace pieces that I found at my local craft store. Here's where you can experiment with the size and shape of your lace. I wanted my circles to line up, so I pulled and stretched the lace from the back until it was taught. Tighten the screw at the top of the hoop with pliers. Trim the extra pieces from the back - I ended up with some perfect scalloped pieces that I plan on using in another project.
To create a more vintage, distressed feel, I used Krylon Indoor/Outdoor Primer in All-Purpose White to partially color the natural tone of the hoops and lace. Once dry, I applied Ranger Stickles in Frosted Lace to accent the spiderwebs.
I created three scary spiders from large buttons I found in my Buttons Galore and More Grandma's Grab Bag stash. Cut a 12" chenille stem in four equal pieces, fold each in half and glue two on each side of the back of the button to create eight legs. Attach colored rhinestone eyes - I used green, orange and purple on my spiders.
Glue each spider on to their web, or hang from a length of black ribbon. Hang your finished spiderwebs by looping a 24" length of black ribbon through each screw at the top of the embroidery hoop.
These spiderwebs with button spiders were really quick and easy to create in just a few hours and would make excellent and inexpensive gifts to give for Halloween.
Thanks for stopping by! -Beth
Monday, October 10, 2011
BUTTONS GALORE AND MORE - CANDY CORN TREAT CUPS!
I have a project up on the Buttons Galore and More Blog today! If you haven't been by the blog in a few days, please check it out - Vicki O'Dell has completed a re-design and it looks FABULOUS!
I used buttons and an inexpensive peat pot to create Candy Corn Treat Cups - great to fill with candy and give to co-workers or teachers for Halloween!
See the entire post here.
Thanks for stopping by -Beth
Monday, October 3, 2011
DESIGNER CRAFTS CONNECTION - FIRST MONDAY IN OCTOBER PROJECT
This month the Designer Crafts Connection is participating in a manufacturer challenge. Sponsored by:
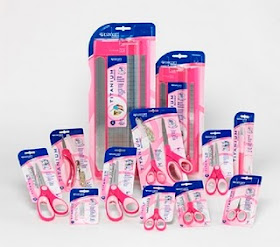
Each Designer received Westcott® Brand scissors and tools to work with. The thing I like best about these scissors is that I can cut paper and fabric with the same pair! Plus these scissors are non stick titanium bonded. This was important for this challenge because each Designer also received product from VELCRO® Brand Hook and Loop Fasteners and The Duck Brand® Patterned Duct Tape Rolls and sheets. Lots of sticky stuff to cut and no sticking which let's me consentrate on crafting!
Here's how I made the Duct Tape Curtain Tie Back & Tassel:
To begin, I cut four 10" strips of the pink and black zebra Duct Tape with the 8" Titanium Scissors, using the Westcott Cutting Mat. I layered the first two over my peate pot in a criss cross pattern, then notched and ripped the other two in half length-wise. I continued to criss cross the lengths of Duct Tape until the entire surface was covered. Tuck and secure all of the ends inside the pot.
I then cut a 20" length of black Duct Tape and folded the length up about two thirds on to itself. Using a gather and secure technique, I created a ruffle around the opening of the pot. Cut away any excess.
I then cut twenty lengths of hot pink Duct tape each 20" long and placed two lengths together, sticky side in. I notched each of my ten strips six times along the width with the 8" Titanium Scissors and ripped to create 70 smaller strips. I laid 69 of the strips out and used the last strip to secure the bundle in the center.
Fold the bundle of strips in half and secure to the inside of the pot with hot glue. I then painted a 1" wooden ball knob with Americana paint by DecoArt in Lamp Black and gave it some pop with Sparkle Top Coat. Secure to top of pot with hot glue.
Finally cut two 24" lengths of hot pink Duct Tape and place them sticky sides together to create one strip. Place the Velcro sticky back hook and loop tape on the ends and secure around your curtain. Attach the completed Tassel to the Tie Back with additional Velcro sticky back hook and loop tape.
This is the FANTASTIC giveaway for October (for US residents only please), provided by Westcott:
http://westcottbrand.blogspot.com/2011/10/designer-crafts-connection-charitable.html
Click on the link above to enter to win and it will take you to the Westcott® blog where you can comment on your favorite projects from this challange. The winner will be announced November 1st. You can also get an extra chance to win by leaving a comment about the hop on the Westcott Facebook Fan Page.
Make sure to hop round the ring first to see what everyone else came up with by cliking on the HOP FORWARD or HOP BACKWARD link in the Designer Crafts Connection blinkie on my right sidebar!
Thanks for stapping by! -Beth